
HP-UX ProviderSvcsBase Administrator Guide, September 2011


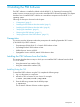
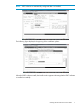

3. Go to the Installation page and review the Prerequisites to ensure that your system meets the
requirements.
4. Select the Receive for Free >> option at the bottom right of the page.
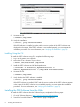
5. Select the appropriate release of the HP-UX operating system.
6. Enter your registration information. Read and accept the terms and conditions.
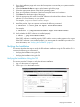
7. Click Next >> at the bottom right of the page.
8. Click the appropriate link under Download Software to download the software. Save the
software on a local directory on your system.
For example: /tmp/ProviderSvcsBase.depot
9. Install the product, login as superuser and enter the following command:
# swinstall -s <full path of depot> ProviderSvcsBase
For example,
# swinstall -s /tmp/ProviderSvcsBase.depot ProviderSvcsBase
10. Verify whether the PSB™ software is installed properly.
# swlist | grep ProviderSvcsBase
If the PSB™ software is installed properly, PSB™ and the version number appear in the output.
If the PSB™ software is not installed properly, you must repeat the installation procedure. For
more information, see “Verifying the Installation” (page 9).
Verifying the Installation
This section describes the steps to verify the PSB software installation using the TUI and the CLI. It
contains the following two sub-sections:
• Verifying the Installation Using the TUI
• Verifying the Installation Using the CLI
Verifying the Installation Using the TUI
This section provides TUI steps to verify the software installation.
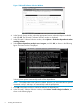
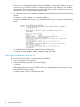
1. Log in to the system as a superuser.
2. Click Logfile in the Install window.
Verifying the Installation 9