
Veritas Volume Manager 5.0.1 Migration Guide, HP-UX 11i v3, First Edition, November 2009


conversion. Some of them (e.g. backing up user data) are left to you to accomplish
through your regular administrative processes.
The steps in the conversion process are:
■ Identifying LVM volume groups for conversion.
■ Analyzing an LVM group to see if conversion is possible.
■ Taking actions to make conversion possible if analysis fails.
■ Backing up your LVM configuration and user data.
■ Planning for new VxVM logical volume names.
■ Stopping application access to volumes in the volume group to be converted.
■ Converting a volume group.
■ Taking actions if conversion fails.
■ Implementing changes for new VxVM logical volume names
■ Restarting applications on the new VxVM volumes.
■ Tailoring your VxVM configuration.
These steps are described in detail in later sections of this chapter. Also available
are annotated examples on how to use vxvmconvert.
See “Examples” on page 37.
Additional information is available on restoring back to your original LVM
configuration.
See “Restoring the LVM volume group configuration” on page 33.
Identifying LVM disks and volume groups for conversion
The obvious first step in the conversion process is to identify what you want to
convert. The native LVM administrative utilities like vgdisplay and SMH can
help you identify candidate LVM volume groups as well as the disks that comprise
them.
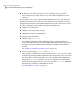
You can also use the vxvmconvert command and the vxdisk command to examine
groups and their member disks. The information presented through the
vxvmconvert command and the vxdisk command and their interpretation are
available.
See “Examples” on page 37.
You can also list the LVM disks with the following VxVM command:
# vxdisk list
25Converting LVM to VxVM
Converting LVM volume groups to VxVM disk groups