
Veritas Volume Manager 4.1 Troubleshooting Guide (HP-UX 11i v3, February 2007)

Reattaching Failed Disks
8 VERITAS Volume Manager Troubleshooting Guide
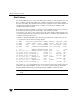
3. Use the vxdisk list command to verify that the failing flag has been cleared:
# vxdisk list
DEVICE TYPE DISK GROUP STATUS
c1t1d0 auto:simple mydg01 mydg online
c1t2d0 auto:simple mydg02 mydg online
c1t3d0 auto:simple mydg03 mydg online
. . .
Reattaching Failed Disks
You can perform a reattach operation if a disk could not be found at system startup, or if
VxVM is started with some disk drivers unloaded and unloadable (causing disks to enter
the failed state). If the underlying problem has been fixed (such as a cable or controller
fault), use the vxreattach command to reattach the disks without plexes being flagged
as STALE. However, the reattach must occur before any volumes on the disk are started.
The vxreattach command is called as part of disk recovery from the vxdiskadm
menus and during the boot process. If possible, vxreattach reattaches the failed disk
media record to the disk with the same device name. Reattachment places a disk in the
same disk group that it was located in before and retains its original disk media name.
To reattach a failed disk:
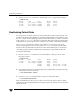
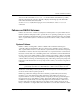
1. Use the vxdisk list command to see which disks have failed, as shown in the
following example:
# vxdisk list
DEVICE TYPE DISK GROUP STATUS
c1t1d0 auto:simple mydg01 mydg online
c1t2d0 auto:simple mydg02 mydg online
- - mydg03 mydg failed was: c1t3d0
- - mydg04 mydg failed was: c1t4d0
2. Once the fault has been corrected, the disks can be reattached by using the following
command to rescan the device list:
# /usr/sbin/vxdctl enable
3. Use the vxreattach command with no options to reattach the disks:
# /etc/vx/bin/vxreattach
After reattachment takes place, recovery may not be necessary unless a disk was faulty
and had to be replaced. Reattachment can fail if the original (or another) cause for the disk
failure still exists.