
Veritas Volume Manager 4.1 Administrator's Guide (HP-UX 11i v3, February 2007)


Removing a Disk from Use as a Hot-Relocation Spare
336 VERITAS Volume Manager Administrator’s Guide
Any VM disk in this disk group can now use this disk as a spare in the event of a
failure. If a disk fails, hot-relocation should automatically occur (if possible). You
should be notified of the failure and relocation through electronic mail. After
successful relocation, you may want to replace the failed disk.
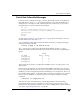
Removing a Disk from Use as a Hot-Relocation Spare
While a disk is designated as a spare, the space on that disk is not used for the creation of
VxVM objects within its disk group. If necessary, you can free a spare disk for general use
by removing it from the pool of hot-relocation disks.
To remove a spare from the hot-relocation pool, use the following command:
# vxedit [-g diskgroup] set spare=off diskname
where diskname is the disk media name.
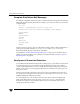
For example, to make mydg01 available for normal use in the disk group, mydg, use the
following command:
# vxedit -g mydg set spare=off mydg01
Alternatively, you can use vxdiskadm to remove a disk from the hot-relocation pool:
1. Select menu item 12 (Turn off the spare flag on a disk) from the
vxdiskadm main menu.
2. At the following prompt, enter the disk media name of a spare disk (such as mydg01):
Menu: VolumeManager/Disk/UnmarkSpareDisk
Use this operation to turn off the spare flag on a disk.
This operation takes, as input, a disk name. This is the same
name that you gave to the disk when you added the disk to the
disk group.
Enter disk name [<disk>,list,q,?] mydg01
The following confirmation is displayed:
VxVM NOTICE V-5-2-143 Disk mydg01 in mydg no longer marked as a
spare disk.
3. At the following prompt, indicate whether you want to disable more spare disks (y)
or return to the vxdiskadm main menu (n):
Turn-off spare flag on another disk? [y,n,q,?] (default: n)