
Veritas Volume Manager 4.1 Administrator's Guide (HP-UX 11i v3, February 2007)


Chapter 12, Administering Hot-Relocation
How Hot-Relocation Works
331
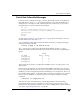
Partial Disk Failure Mail Messages
If hot-relocation is enabled when a plex or disk is detached by a failure, mail indicating
the failed objects is sent to root. If a partial disk failure occurs, the mail identifies the
failed plexes. For example, if a disk containing mirrored volumes fails, you can receive
mail information as shown in the following example:
To: root
Subject: Volume Manager failures on host teal
Failures have been detected by the VERITAS Volume Manager:
failed plexes:
home-02
src-02
See “Modifying the Behavior of Hot-Relocation” on page 344 for information on how to
send the mail to users other than root.
You can determine which disk is causing the failures in the above example message by
using the following command:
# vxstat -g mydg -s -ff home-02 src-02
The -s option asks for information about individual subdisks, and the -ff option
displays the number of failed read and write operations. The following output display is
typical:
FAILED
TYP NAME READS WRITES
sd mydg01-04 0 0
sd mydg01-06 0 0
sd mydg02-03 1 0
sd mydg02-04 1 0
This example shows failures on reading from subdisks mydg02-03 and mydg02-04 of
disk mydg02.
Hot-relocation automatically relocates the affected subdisks and initiates any necessary
recovery procedures. However, if relocation is not possible or the hot-relocation feature is
disabled, you must investigate the problem and attempt to recover the plexes. Errors can
be caused by cabling failures, so check the cables connecting your disks to your system. If
there are obvious problems, correct them and recover the plexes using the following
command:
# vxrecover -b -g mydg home src
This starts recovery of the failed plexes in the background (the command prompt
reappears before the operation completes). If an error message appears later, or if the
plexes become detached again and there are no obvious cabling failures, replace the disk
(see “Removing and Replacing Disks” on page 90).