
VERITAS Volume Manager 3.5 User's Guide - VERITAS Enterprise Administrator (September 2004)


Disk Tasks
Customizing Disks for Hot Relocation
Chapter 3 85
Customizing Disks for Hot Relocation
You can customize your disks in the following ways:
• Specify individual disks to act as Hot Spares
• Prevent a disk from being used for Hot Relocation or Hot Spare
• Mark a disk as Reserved
Each disk must be customized individually, you cannot set disk usage for
a group of disks:
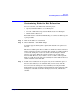
Step 1. Click on the disk to be customized.
Step 2. Choose Actions > Set Disk Usage.
A window appears offering three options. The default is no options are
selected.
The Reserved disk option allows a disk to be marked so that it will not be
used in automatic selection operations. For example, if a disk is marked
as reserved, during the create new volume wizard using the default
option to auto select disks, the volume would not be created on the
reserved disk. However, if you wish to create a volume on that specific
disk, you could choose the option to manually select the disks for the new
volume and then select that disk.
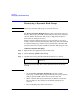
Step 3. A disk can be marked for use for spare only, or for neither hot spare or
hot relocation. When you are satisfied with your selection, click OK.
You can review the settings for all your disks by selecting the Disks
folder in the tree pane and then viewing Disks tab in the right pane. The
settings for each disk are listed in the Spare, Reserved, and Hot Use
columns.