
VERITAS Volume Manager 3.5 User's Guide - VERITAS Enterprise Administrator (September 2004)


Volume Tasks
Using the Volume Snapshot Feature
Chapter 4136
A context menu is displayed.
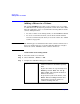
Step 2. Select Snap > Snap Shot.
The Snapshot Volume dialog box is displayed. You are asked to select the
snapshot mirror to be used to create the snapshot volume.
Step 3. Select the mirror and click OK.
When there is only one snapshot mirror, “Automatic select mirror to add
snapshot” will be highlighted. If there are multiple mirrors and you want
to select the mirror to be used, click to select “Manual select which
mirror to add snapshot.” You then can select the mirror from the list on
the screen.
Click OK.
The snapshot mirror is detached from the original volume and a new
volume is created that is associated with the snapshot mirror.
The snapshot mirror is no longer displayed on the Mirrors tab for the
original volume. The new snapshot volume is displayed under the
Volumes folder in the tree view. The program assigns it the next
available drive letter. You can now use the snapshot volume for backup
or other purposes.
NOTE
• FastResync is not supported for RAID-5 volumes
• The Volume Snapshot Interactive task requires a volume name and a
snapshot name.
• The snapshot volume is an exact copy of the original volume at the
time the snapshot phase of the procedure starts.
• After you create the snapshot copy of the volume, remember to back
it up to tape or some other media. Remove the snapshot volume
when it is no longer needed.
• The snapstart phase of this task may take a long time, depending on
the size of the volume.