
VERITAS Volume Manager 3.5 Installation Guide (September 2004)


Setting up the VxVM Environment
Using vxinstall
Chapter 3
43
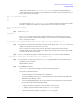
If you enter n, the vxinstall program prompts you for a disk name for each disk on the
controller, as follows:
Enter disk name for c1t0d0 [<name>,q,?](default: disk01)
For each disk, enter the desired disk name and press Return.
When all of the disks in the current disk array have been named, press Return to move on to the
next disk array.
• To install one disk at a time, select 2.
Each disk is handled separately and you are prompted for information on a per-disk basis. This
allows you to install a disk as a pre-existing disk, install it as a new disk, or leave it alone.
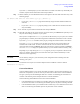
At the prompt, indicate how you want this disk to be handled:
Options 1 and 2 allow you initialize the disk or to omit it from installation.
Repeat this step for all disks on the current disk array.
When all of the disks on the current disk array have been named, press Return to move on to the
next disk array.
• To leave all disks in the disk array unaltered, select 3.
No changes are made to the disks and they are not placed under VxVM control. If applications are
currently using these disks and you do not want to upgrade these applications to use VxVM, use
this option to ensure that your applications continue to use the disks without modification.
Step 5. Repeat Step 4 for each of the remaining disk arrays on your system.
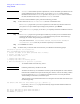
When you have completed the vxinstall procedure for all disk arrays on your system, the
vxinstall program displays a summary of the disks you have designated for initialization (New
Disk) on each controller.
If you enter y, the vxinstall program proceeds to initialize (destroying any existing data) all disks
listed with New Disk.
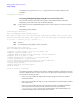
If you enter n, the vxinstall program prompts you for the name of a disk to be removed from the
list and excluded from Volume Manager control, as follows:
Enter disk to be removed from your choices. Hit return when
done.
[<name>,q,?]
Step 6. Enter the name of the disk to be removed from the list and press Return. Repeat for each disk to be
removed and then press Return once more. The vxinstall program displays an updated summary
without the disks chosen for removal. If you are satisfied with the summary, enter y.
Step 7. Depending on your input during the vxinstall procedure, you may be requested to shut down and
reboot your machine. If this happens, shut down and reboot your machine immediately or at the
earliest convenient opportunity.
CAUTION Do not make any changes to your disk or file system configurations before shutting down and
rebooting your system.