
VERITAS Volume Manager 3.5 Administrator's Guide (September 2002)

Removing Disks
74 VERITAS Volume Manager Administrator’s Guide
4. Build a new kernel and reboot the system:
# mk_kernel -v -o /stand/vmunix
# kmupdate
# reboot -r
Removing Disks
You canremovea diskfroma system and moveit toanother system if thedisk isfailing or
has failed. Before removing the disk from the current system, you must:
1. Stop all activitybyapplications to volumes thatareconfiguredonthe diskthatis to be
removed. Unmount file systems and shut down databases that are configured on the
volumes.
2. Use the following command to stop the volumes:
# vxvol stop volume1 volume2 ...
3. Move the volumes to other disks or back up the volumes. To move a volume, use
vxdiskadm to mirror the volume on one or more disks, then remove the original
copy of thevolume. If thevolumes areno longer needed,they canberemoved instead
of moved.
Before removing a disk, make sure any data on that disk has either been moved to other
disks or is no longer needed. Then remove the disk using the vxdiskadm utility, as
follows:
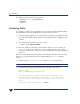
1. Select menu item 2 (Remove a disk) from the vxdiskadm main menu.
Note You must disable the disk group before you can remove the last disk in that group.
2. At the following prompt, enter the disk name of the disk to be removed:
Remove a disk
Menu: VolumeManager/Disk/RemoveDisk
Use this operation to remove a disk from a disk group. This
operation takes a disk name as input. This is the same name
that you gave to the disk when you added the disk to the disk
group.
Enter disk name [<disk>,list,q,?] disk01