
VERITAS Volume Manager 3.5 Administrator's Guide (September 2002)


Moving Disk Groups Between Systems
118 VERITAS Volume Manager Administrator’s Guide
Moving Disk Groups Between Systems
An important feature of disk groups is that they can be moved between systems. If all
disks in a disk group are moved from one system to another, then the disk group can be
used by the second system. You do not have to re-specify the configuration.
To move a disk group between systems, use the following procedure:
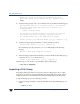
1. On the first system, stop all volumes in the disk group, then deport (disable local
access to) the disk group with the following command:
# vxdg deport diskgroup
2. Move all the disks to the second system and perform the steps necessary
(system-dependent) for the second system and VxVM to recognize the new disks.
This can require a reboot, in which case the vxconfigd daemon is restarted and
recognizes the new disks. If you do not reboot, use the command vxdctl enable to
restart the vxconfigd program so VxVM also recognizes the disks.
3. Import (enable local access to) the disk group on the second system with this
command:
# vxdg import diskgroup
Caution All disks in the disk group must be moved to the other system. If they are not
moved, the import fails.
4. After the disk group is imported, start all volumes in the disk group with this
command:
# vxrecover -g diskgroup -sb
You can also move disks from a system that has crashed. In this case, you cannot deport
the disk group from the first system. When a disk group is created or imported on a
system, that system writes a lock on all disks in the disk group.
Caution The purpose of the lock is to ensure that dual-ported disks (disks that can be
accessed simultaneously by two systems) are not used by both systems at the
same time. If two systems try to manage the same disks at the same time,
configuration information stored on the disk is corrupted. The disk and its data
become unusable.