
VERITAS Volume Manager 3.5 Administrator's Guide (September 2002)


Importing a Disk Group
114 VERITAS Volume Manager Administrator’s Guide
disable all access to the disk before removing the disk.
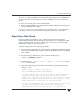
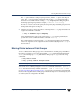
Enter name of disk group [<group>,list,q,?] (default: list)
newdg
5. At the following prompt, enter y if you intend to remove the disks in this disk group:
The requested operation is to disable access to the removable
disk group named newdg. This disk group is stored on the
following disks:
newdg01 on device c1t1d0
You can choose to disable access to (also known as “offline”)
these disks. This may be necessary to prevent errors if
you actually remove any of the disks from the system.
Disable (offline) the indicated disks? [y,n,q,?] (default: n) y
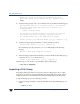
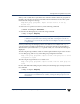
6. At the following prompt, press Return to continue with the operation:
Continue with operation? [y,n,q,?] (default: y)
Once the disk group is deported, the vxdiskadm utility displays the following
message:
Removal of disk group newdg was successful.
7. At the followingprompt,indicate whetheryou want to disableanother diskgroup(y)
or return to the vxdiskadm main menu (n):
Disable another disk group? [y,n,q,?] (default: n)
Alternatively, you can use the vxdg command to deport a disk group:
# vxdg deport diskgroup
Importing a Disk Group
Importing a disk group enables access by the system to a disk group. To move a disk
group from one system to another, first disable (deport) the disk group on the original
system, and then move the disk between systems and enable (import) the disk group.
To import a disk group, use the following procedure:
1. Use the following command to ensure that the disks in the deported disk group are
online:
# vxdisk -s list