
VERITAS Volume Manager 3.2 for HP-UX Release Notes


VERITAS Volume Manager 3.2 for HP-UX Release Notes
Initializing the VERITAS Volume Manager for HP-UX
Chapter 154
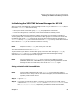
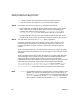
Volume Manager Installation
Menu: VolumeManager/Install
The Volume Manager has detected the following categories of storage
connected to your system:
Enclosures: enc0 enc1 enc2 enc3
enc4 enc5
Others: others0
Do you want to rename the enclosures [y,n,q,?] (default: y) y
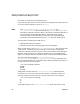
Enter y to assign a new name to the enclosures. This helps to identify their physical
location. Enclosure names cannot exceed 25 characters in length. Enter the name of
the enclosure that you wish to rename, and then enter its new name.
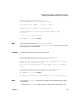
Rename an enclosure
Menu: VolumeManager/Install/Rename enclosure
Enter an enclosure name: [list,q,?] enc1
Enter the new name for enclosure test1: test0
The enclosure name enc1 has been changed to test0
Hit RETURN to continue.
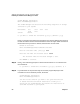
Step 5. Enter y at the following prompt to rename more enclosures or n to continue with
the installation.
Do you wish to rename more enclosures? [y,n,q,?] (default: n) n
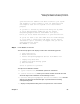
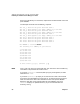
Step 6. If you selected n in the previous step, the vxinstall program displays a brief
introduction to the installation process, as follows:
Volume Manager Installation
Menu: VolumeManager/Install
You will now be asked if you wish to use Quick Installation
or Custom Installation Custom Installation allows you to
select how the Volume Manager will handle the installation of
each disk attached to your system.