
VERITAS Volume Manager 3.1 Storage Administrator Administrator's Guide

Disk Tasks
Reserving a Disk
Chapter 3110
Reserving a Disk
This procedure designates a disk as a reserved disk. A reserved disk is
not considered part of the free space pool. If you perform a task that
requires disk space and you do not specify a disk, the Storage
Administrator allocates space from disks other than the reserved disk.
To reserve a disk
Step 1. Follow the instructions in “Adding a Disk to the Volume Manager” to
place the disk under Volume Manager control and in a disk group.
Step 2. Select the disk to be reserved.
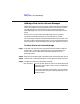
Step 3. Choose Disks > Properties (Selected menu).
Step 4. In the Disk Properties window, go to the General tab and select Reserve.
Click OK.
If you decide that you want to return a reserved disk to the free space
pool, open the Disk Properties window and click Reserve again.
Notes:
• A reserved disk does not belong to the free space pool and is not
available for general use.
• A reserved disk can only be used if you specify the reserved disk when
you perform a task.