
VERITAS Volume Manager 3.1 Storage Administrator Administrator's Guide

Disk Tasks
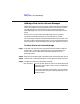
Adding a Disk to the Volume Manager
Chapter 3 105
When you have provided all necessary information in the dialog box,
click OK.
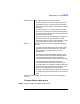
To add a disk to a disk group
Step 1. Select the disk to be added to a disk group.
Add Disk(s) to: Specify where the disk(s) should be placed:
• To add the disk(s) to an existing disk group, select
Existing Disk Group. Type the disk group name in
the Disk Group Name field or click Browse to select a
disk group.
• To add the disk(s) to a new disk group, select New
Disk Group. Type the name of the new disk group in
the Disk Group Name field. The new disk group will
be created for the new disk.
• To place the disk(s) in the free disk pool, select Free
Disk Pool. Disks in the free disk pool are under
Volume Manager control, but do not belong to a disk
group and cannot be used to create volumes.
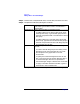
Options Click Show Options to access the optional settings for
this task.
• To create a shared disk group for the disk(s), select
New Disk Group and Create Shared. The Create
Shared option is only applicable in a cluster
environment.
• To specify the Volume Manager disk name for the
disk, type a disk name in the Disk Name(s) field. If
no Volume Manager disk name is specified, the
Volume Manager assigns a default name to the disk.
• To set the disk group activation mode, click
Activation Mode and complete the Activate Disk
Group dialog box. The activation mode controls read
and write access to volumes in the disk group. This
option is only applicable on HP-UX systems.
• To apply a comment attribute to disks that are placed
in a disk group, type the information in the Comment
field.