
VERITAS Volume Manager 3.1 Storage Administrator Administrator's Guide
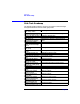
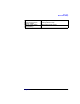

Disk Tasks
Adding a Disk to the Volume Manager
Chapter 3104
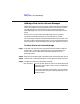
Adding a Disk to the Volume Manager
New disks must be set up on the system, placed under Volume Manager
control, and added to a disk group before they can be used for volumes.
The add disk(s) task performs these tasks to prepare new disks for
Volume Manager use. You can also use this task to add a disk to a disk
group.
When you place a disk under Volume Manager control, the disk is
initialized. Initialization destroys any existing data on the disk.
This task assigns a default Volume Manager disk name to the disk. Once
the disk is under Volume Manager control, you can use the Rename Disk
task to change the Volume Manager disk name (see “Renaming a Disk”).
To add a disk to the Volume Manager
Step 1. If the disk is brand new, select the appropriate host machine node and
choose Hosts > Scan Disks (Selected menu) to set up the disk on the
system. This runs the disk setup commands appropriate for the
operating system.
Step 2. Select the uninitialized disk to be placed under Volume Manager control.
Step 3. Choose Disks > Add (Selected menu) or Disk Add (Command Launcher).
Step 4. Complete the Add Disk(s) dialog box as follows:
Disk Device(s): If the correct disk (device) name is not already displayed
in this field, type the disk’s device name or click Browse
to select the disk.
To set up any new disks on the system, click Scan Disks.
This runs the disk setup commands appropriate for the
operating system.