
VERITAS Volume Manager 3.1 Administrator's Guide


Disk Tasks
Adding a Disk to Volume Manager
Chapter 4160
Adding a Disk to Volume Manager
You must place a disk under Volume Manager control, or add it to a disk
group, before you can use the disk space for volumes. If the disk was
previously in use, but not under Volume Manager control, you can
preserve existing data on the disk while still letting the Volume Manager
take control of the disk. If the user wants to bring all the non LVM disks
under control, they are considered as fresh disks. LVM volume groups
can only be converted to VxVM disk groups. If the disk was previously
not under Volume Manager control, but no data is required to be
preserved, it should be initialized.
NOTE See the VERITAS Volume Manager Migration Guide for more
information on conversion.
To add a disk, use the following command:
# vxdiskadd
devname
where
devname
is the device name of the disk to be added.
To add the device c1t0d0 to Volume Manager control, perform the
following steps:
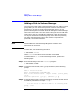
Step 1. Enter the following to start the vxdiskadd program:
# vxdiskadd c1t0d0
Step 2. To continue with the task, enter y (or press Return) at the following
prompt:
Add or initialize disks
Menu: VolumeManager/Disk/AddDisks
Here is the disk selected. Output format: [Device_Name]
c1t0d0
Continue operation? [y,n,q,?] (default: y) y
Step 3. At the following prompt, specify the disk group to which the disk should
be added or press Return to accept rootdg:
You can choose to add this disk to an existing disk
group, a new