
Veritas Storage Foundation™ for Oracle 5.0.1 Graphical User Interface Guide


Volume oracon on PRODdg is ready for snapshot.
Original plex and DCO log for oracon is on PRODdg02.
Snapshot plex and DCO log for oracon is on PRODdg01.
SNAP_PRODdg for snapshot will include: PRODdg01
ALLOW_REVERSE_RESYNC is yes
The snapplan sp3 has been created.
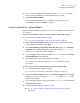
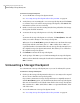
Creating snapshot for a clone database
After your snapplan is validated, you can create a snapshot for your clone database.
To create a snapshot using the Create Clone Database wizard
1
Access the Create Snapshot dialog of the Create Clone Database wizard.
See “Accessing clone database tasks in the Java GUI” on page 23.
2
In the Create Snapshot dialog, verify the snapplan name.
3
Click Next to continue.
4
If the snapshot creation was successful, a confirmation message appears.
5
Click the Show details checkbox to view the actions taken.
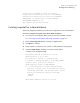
A sample of the snapplan details:
dbed_vmsnap started at 2004-05-13 17:09:40
SFDB repository is up to date.
The database is running in archivelog mode.
A snapshot of ORACLE_SID PROD is in DG SNAP_PRODdg.
Snapplan sp2 is used for the snapshot.
SFDB repository volume is SNAP_ORACLE1.
If -r <relocate_path> is used in dbed_vmclonedb,
make sure <relocate_path> is created and owned by
Oracle DBA. Otherwise, the following mount points
need to be created and owned by Oracle DBA:
/prod_db.
/oracon.
dbed_vmsnap ended at 2003-05-13 17:10:29
45Using a clone database
Creating a clone database