
Veritas Storage Foundation 5.1 SP1 Cluster File System Installation Guide (5900-1510, April 2011)

Configuring server-based fencing on the new node
Perform this step if your existing cluster uses server-based I/O fencing.
To configure server-based fencing on the new node
1
Log in to each CP server as the root user.
2
Update each CP server configuration with the new node information:
# /opt/VRTScps/bin/cpsadm -s thunderbolt \
-a add_node -c clus1 -u {f0735332-1dd1-11b2} -h saturn -n2
Node 2 (saturn) successfully added
3
Verify that the new node is added to the CP server configuration:
# /opt/VRTScps/bin/cpsadm -s thunderbolt -a list_nodes
The new node must be listed in the output.
4
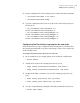
Add the VCS user cpsclient@saturn to each CP server:
# /opt/VRTScps/bin/cpsadm -s thunderbolt \
-a add_user -e cpsclient@saturn \
-f cps_operator -g vx
User cpsclient@saturn successfully added
To configure server-based fencing with security on the new node
1
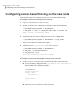
As the root user, create the VCS user and the domain on the new node:
■ Create a dummy configuration file /etc/VRTSvcs/conf/config/main.cf
that resembles the following example:
# cat main.cf
include "types.cf"
cluster clus1 {
SecureClus = 1
}
system saturn {
}
■ Start VCS in one node mode on the new node:
Adding a node to a cluster
Configuring server-based fencing on the new node
294