
Veritas Storage Foundation 5.1 SP1 Cluster File System Administrator"s Guide (5900-1738, April 2011)

4
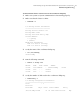
If your setup uses VRTSvxvm version 5.1 RP2 (or later) or 5.1 SP1 (or later),
then skip to step 5. You need not set coordinator=off to add or remove disks.
For other VxVM versions, perform this step:
Turn off the coordinator attribute value for the coordinator disk group.
# vxdg -g vxfencoorddg set coordinator=off
5
To remove disks from the coordinator disk group, use the VxVM disk
administrator utility vxdiskadm.
6
Perform the following steps to add new disks to the coordinator disk group:
■ Add new disks to the node.
■ Initialize the new disks as VxVM disks.
■ Check the disks for I/O fencing compliance.
■ Add the new disks to the coordinator disk group and set the coordinator
attribute value as "on" for the coordinator disk group.
See the Veritas Storage Foundation Cluster File System Installation Guide for
detailed instructions.
Note that though the disk group content changes, the I/O fencing remains in
the same state.
7
From one node, start the vxfenswap utility. You must specify the diskgroup
to the utility.
The utility performs the following tasks:
■ Backs up the existing /etc/vxfentab file.
■ Creates a test file /etc/vxfentab.test for the diskgroup that is modified on
each node.
■ Reads the diskgroup you specified in the vxfenswap command and adds
the diskgroup to the /etc/vxfentab.test file on each node.
■ Verifies that the serial number of the new disks are identical on all the
nodes. The script terminates if the check fails.
■ Verifies that the new disks can support I/O fencing on each node.
8
If the disk verification passes, the utility reports success and asks if you want
to commit the new set of coordinator disks.
89Administering Storage Foundation Cluster File System and its components
Administering I/O Fencing