
Veritas 5.0 Installation Guide (September 2006)

Chapter 4 21
4 Installing VxFS 5.0 and VxVM 5.0
This chapter describes how to install VxFS 5.0 and VxVM 5.0 with the swinstall(1M)
command. Prior to installing Veritas 5.0 products, verify that all required patches described in
“Patch Requirements” on page 10 are available at the time of installation.
Mounting the HP-UX Serviceguard and Storage
Management Products Media
To mount the media, complete the following steps:
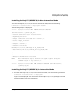
Step 1. Insert the media into the drive and log in as root:
$ su root
Step 2. To display disk information, enter the following:
# ioscan -fnC disk
The -f option is used for full listing, -n option is used for listing device file names,
and the -C option is used for listing a subset of the input and output system.
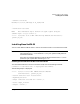
Step 3. To create a mount directory under which to mount the media, enter the following:
# mkdir -p <mount_dir_name>
Step 4. To mount the media, enter the following:
# mount <absolute device-path> <mount_dir_name>
where <absolute device-path> is the device path for the CD-ROM and
<mount_dir_name> is the mount point for the media.
Step 5. To verify that the media is mounted, enter the following:
# mount
NOTE You cannot install the Veritas 5.0 products on a system where the Veritas 4.1
versions of Storage Management for Oracle, HP Serviceguard Storage
Management, or HP Serviceguard Cluster File System product suites have