
Veritas 4.1 Installation Guide (HP-UX 11i v3, February 2007)

# vxprint -F “%sdnum” diskname
If the output is 0, remove the disk from Volume Manager control:
# vxdg rmdisk diskname
See vxdg (1M), for detailed description of the supported options.
# vxdisk rm devname
See vxdisk (1M), for detailed description of the supported options.
If the output is not 0, remove sub-disks from the disk and then remove the disk.
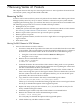
10. Copy the data in the next volume to be removed to the newly created free space.
11. Reboot the system after all volumes have been converted successfully.
12. Verify that no open volumes remain on the system:
# vxprint -Aht -e v_open
See vxprint (1M), for detailed description of the supported options.
If any volumes remain open, repeat the above steps.
Shutting Down VxVM
Shut down VxVM:
# vxdctl stop
See vxdctl (1M), for detailed description of the supported options.
# vxiod -f set 0
See vxiod (1M), for detailed description of the supported options.
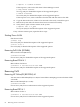
Removing Full VxVM (B9116BA)
Remove Full VxVM (B9116CA):
# swremove B9116BA
See swremove (1M), for detailed description of the supported options.
Removing Base-VXVM 4.1
Remove Base-VXVM 4.1:
# swremove -x autoreboot=true Base-VXVM
See swremove (1M), for detailed description of the supported options.
Removing VxFS
Removing HP OnlineJFS (B3929EA) 4.1
You must remove HP OnlineJFS (B3929EA) 4.1 license before attempting to remove the Base-VXFS
4.1 bundle.
Remove HP OnlineJFS (B3929EA):
# swremove B3929EA
See swremove (1M) for more information on the supported options.
Removing Base-VXFS 4.1
Remove Base-VxFS 4.1:
# swremove -x autoreboot=true Base-VXFS
See swremove (1M) for more information on the supported options.
68 Removing Veritas 4.1 Products