
LVM Volume Group Dynamic LUN Expansion (DLE) and Contraction (DLC) (September 2009)

10
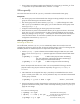
• Physical extent renumbering enables more flexibility for picking max_pv and max_pe. If the
-t output does not provide suitable values, check the -tn output.
Offline vgmodify
This section discusses the use of the vgmodify command on a deactivated volume group.
Prerequisites
• T
he volume group must be deactivated when changes are being made (for the root volume
group this means booting into maintenance mode).
• The volume group must be cluster unaware (vgchange –c n) before changes are made.
After vgmodify has altered the volume group, you can then make the volume group cluster
aware (vgchange –c y).
• All physical volumes belonging to volume group must be accessible.
• There cannot be any entries in the bad block directory of any physical volume in the volume
group. The vgmodify command reports any disks containing bad blocks and exit without
making any changes. Use pvdisplay –d to display the count of bad blocks and verify this
is the cause of the failure. To overcome this problem, the disk can be replaced and the
configuration restored with vgcfgrestore.
Offline vgmodify procedures
Performing an offline DLE
For an offline DLE, each time vgmodify is run it automatically obtains the current disk size and
compares this with the size known to LVM. All physical volumes that are a part of a volume group are
handled by default. No additional options are required to handle a DLE event.
1. Use the
vgmodify -t option to determine the available settings that best meet your needs.
Note: You can run the vgmodify –t operation against an activated or deactivated volume
group.
# vgmodify –t –v vg02 # Table without physical extent renumbering
(For more information, see the Physical extent renumbering (-n
option) and pvmove enhanc
ement section)
# vgmodify –t –v –n vg02 # Table with physical extent renumbering
Review the output and select the new values. You are responsible for freeing up the first
physical extent on any physical volume as required by using pvmove, lvreduce, or
lvremove.
2. Check that these can be applied. This step is particularly recommended when the volume
group is currently active and in use. You can perform this step on an activated or deactivated
volume group, as follows:
# vgmodify –r –p 150 –e 2000 –v vg02 # Note –r, review mode.
3. During a maintenance window, deactivate the volume group (for the root VG boot the volume
group into maintenance mode), make it cluster unaware (if necessary), and run vgmodify to
apply the new settings.
For a non-root volume group:
# vgchange –a n vg02
# Deactivate the volume group.
# vgmodify –v –e 2000 –p 150 vg02 # Same options and arguments as in
the previous step but without –r.
# vgchange –a y –s vg02 # Activate the volume group.