
HP-UX 11i v3 - LVM Volume Group Version Migration (September 2010)
11
Migrating a Version 1.0 volume group to a Version 2.x volume group
Verify that all prequisites are met
Run vgversion in review mode. The volume group can be active while running vgversion in
review mode. If any of the migration prerequisites are not met, the review option lists them. You must
correct any prerequisites that are not met. The following example shows the migration of a Version
1.0 volume group with a physical volume marked as spare and a physical volume marked as a
bootable physical volume or physical volume (PV).
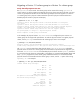
# vgversion -V 2.1 -v -r vg01
vgversion: Error: The Physical Volume "/dev/disk/disk348" is configured
as a spare.
vgversion: Error: The Physical Volume "/dev/disk/disk349" is a boot disk.
vgversion: Error: Volume Group Version 2.1 does not support bootable Physical
Volumes. Use vgmodify(1M) to make the Physical Volume non-bootable.
vgversion: Error: Volume Group Version 2.1 does not support sparing.
Use pvchange(1M) to change to a regular Physical Volume.
Review complete. Volume group not modified
In this example, the physical volume /dev/disk/disk348 is configured as spare. Version 2.x
volume groups do not support the spare feature. To mark the physical volume as a regular physical
volume, use the pvchange command when the volume group is active. For example:
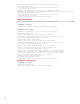
# pvchange -z n /dev/disk/disk348
Physical volume "/dev/disk/disk348" has been successfully changed.
Volume Group configuration for /dev/vg01 has been saved in /etc/lvmconf/vg01.conf
The vgversion review output shows that physical volume /dev/disk/disk349 is a bootable
physical volume. A Version 2.x volume group cannot be booted. To proceed with the migration, you
must mark /dev/disk/disk349 as a non-bootable physical volume. Use the vgmodify command
to convert the physical volume as non-bootable. In the HP-UX 11i v3 March 2009 Update release and
later, vgmodify supports the online volume group modification feature. To convert the bootable
physical volume to non-bootable when the volume group is active, use the -a option while running
vgmodify –B n. For example:
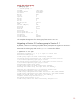
# vgmodify -a -B n vg1 /dev/rdisk/disk378
Current Volume Group settings:
Max LV 255
Max PV 16
Max PE per PV 1016
PE Size (Mbytes) 256
VGRA Size (Kbytes) 176
An update to the Volume Group IS required
New Volume Group settings:
Max LV 255
Max PV 16
Max PE per PV 1016
PE Size (Mbytes) 256
VGRA Size (Kbytes) 176