
HP-UX 11i v3 LVM Volume Group Migration

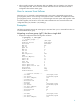
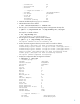
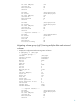
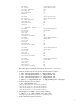
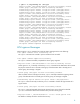
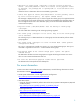
Table Of Contents
5. After successful migration, the destination disks are added to the /etc/lvmtab or /etc/lvmtab_p
LVM configuration files. The source disks and their alternate links are removed from the LVM
configuration files and the volume group.
How to recover from failures
When the vgmove command is interrupted manually or the system is rebooted during the volume
group migration, data is not lost as long as the physical volume is available. To complete the volume
group migration process, invoke the vgmove command again with same syntax and arguments. After
successful migration, the entries for source disks and its alternate links are removed from the LVM
configuration files (/etc/lvmtab or /etc/lvmtab_p).
Examples
The following examples assume the volume group is activated. The vgmove command fails when run
on a deactivated volume group.
Migrating a volume group (vg01) that has a single disk
1. Display the configuration before the migration as follows:
# vgdisplay -v /dev/vg01
--- Volume groups ---
VG Name /dev/vg01
VG Write Access read/write
VG Status available
Max LV 255
Cur LV 3
Open LV 3
Max PV 16
Cur PV 1
Act PV 1
Max PE per PV 1016
VGDA 2
PE Size (Mbytes) 32
Total PE 63
Alloc PE 60
Free PE 3
Total PVG 0
Total Spare PVs 0
Total Spare PVs in use 0
VG Version 1.0
VG Max Size 508g
VG Max Extents 16256
--- Logical volumes ---
...LV Name /dev/vg01/lvol1
...LV Status available/syncd
...LV Size (Mbytes) 640
...Current LE 20
...Allocated PE 20
...Used PV 1
...LV Name /dev/vg01/lvol2
...LV Status available/syncd
...LV Size (Mbytes) 640
...Current LE 20
...Allocated PE 20
...Used PV 1
...LV Name /dev/vg01/lvol3
...LV Status available/syncd
...LV Size (Mbytes) 640
4