Network Information Service (NIS) B.11.31.
© Copyright 2008 Hewlett-Packard Development Company, L.P Legal Notices © Copyright 2008 Hewlett-Packard Development Company, L.P. Confidential computer software. Valid license from HP required for possession, use or copying. Consistent with FAR 12.211 and 12.212, Commercial Computer Software, Computer Software Documentation and Technical Data for Commercial Items are licensed to the U.S. Government under vendor’s standard commercial license.
Table of Contents About This Document.........................................................................................................9 Intended Audience.................................................................................................................................9 Document Organization.........................................................................................................................9 Typographic Conventions.....................................................
Controlling NIS Logging......................................................................................................................33 4 Configuring and Administering an NIS Slave Server..............................................35 Modifying the Slave Server passwd File..............................................................................................35 Modifying Slave Server group File...................................................................................................
List of Figures 1-1 1-2 1-3 Illustration of a Sample NIS Network...........................................................................................12 Flow of Information in an NIS Domain........................................................................................15 Servers Serving Multiple NIS Domains........................................................................................
List of Tables 1-1 1-2 1-3 NIS Daemons.................................................................................................................................13 NIS Commands.............................................................................................................................13 NIS Source Files.............................................................................................................................
About This Document This document describes how to configure and administer Network Information Service (NIS ™) on systems running HP-UX 11i v3. It also describes how to troubleshoot NIS. Intended Audience This document is intended for system administrators who install and configure UNIX® systems using the Open Network Computing (ONC) suite of products.
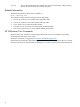
Ctrl+A This symbol indicates that you hold down the first named key while pressing the key or mouse button that follows the plus. Related Information Additional information about NIS is available at: http://docs.hp.com This website contains the following documents about NIS: • • • • • HP-UX 11i v3 Release Notes (5992-1996), September 2007. HP-UX 11i v3 Release Notes (5991-6469), February 2007. ONC+ Release Notes (5991-8714), March 2007. ONCplus B.11.31.01 Release Notes (5992-2334), September 2007.
1 Introduction This chapter introduces you to Network Information Service (NIS) and its features. It also discusses the components in an NIS network.
A Sample NIS Network Figure 1-1 represents a typical NIS network consisting of the NIS master, the NIS slave server, and clients. Figure 1-1 Illustration of a Sample NIS Network The host name of the NIS master is mammoth and the host name of the slave server is ocelot. Both the master and the slave servers reside in the marketing domain. The client systems Client 1, Client 2, Client 3, Client 4, and Client 5 connect to the master and slave servers to obtain NIS configuration information over the 20.21.12.
NIS Domains An NIS domain is a collection of systems that share a common set of NIS maps. Each domain has a domain name and the systems that share a common set of maps belong to the same domain. Any system can belong to a given domain as long as there is a server for that domain's maps in a reachable network. An NIS client system obtains its domain name and binds to an NIS server as part of its boot process. NIS Daemons Table 1-1 lists the daemons that provide the NIS service.
Table 1-2 NIS Commands (continued) Command Description ypwhich Returns the name of the NIS server for the local client, or the name of the NIS master server for one or more NIS maps. For more information, see ypwhich (1). ypxfr Transfers one or more NIS maps from a master server to the local slave server. A slave server calls ypxfr when yppush is executed on the master server. For more information, see ypxfr (1M).
Figure 1-2 Flow of Information in an NIS Domain Maps are created from configuration files on the master server Master Server maps Maps are transferred from the master server to the slave servers maps Slave Server Slave Server data data Client data Slave Server sends configuration data to the clients Client Master Server can also send configuration data directly to the clients Client The flow of NIS information from the master server to the client includes the following steps: 1. 2.
Startup Scripts in NIS Services This section discusses the startup sequence for the NIS daemons during a normal system boot. Following are the NIS startup scripts: • • /sbin/init.d/nis.server /sbin/init.d/nis.client These scripts can be used to start and stop NIS on a system. They also read the /etc/rc.config.d/namesvrs file to determine the daemons that must be started, and detect whether the system is a server or a client. The nis.server script is executed at system run level 2 on the NIS server.
The NIS subsystem can now interpret the passwd and shadow files when the system is in shadow mode, that is, the NIS subsystem can recognize a system running in shadow mode, and build, store, and retrieve the password information accordingly. NOTE: The encrypted password information used for creating NIS password maps is present in the shadow file and is visible in the passwd maps (passwd.byname and passwd.byuid). To enable this feature, a variable, SHADOW_MODE, is introduced in the /etc/rc.config.
The ypbind protocol version v1 is obsolete and any request from the NIS client that specifically requests to use the ypbind protocol version v1 is rejected. • Files for Resolving Map Nicknames The NIS commands, ypcat and ypmatch, use the /var/yp/nicknames file to resolve the map nicknames. Following are the contents of the /var/yp/nicknames file: passwd passwd.byname group group.byname networks networks.byaddr hosts hosts.byname ipnodes ipnodes.byname protocols protocols.bynumber services services.
2 Planning an NIS Network This chapter describes how to plan the layout of your NIS network. It tells you how to perform the following tasks: • • • “Determining the Number of NIS Domains Required” (page 19) “Determining the Number of NIS Servers ” (page 19) “Determining the Hosts that will be NIS Servers” (page 19) Determining the Number of NIS Domains Required For many sites, all hosts can belong to the same domain and it is not necessary to set up more than one domain.
3 Configuring and Administering an NIS Master Server This chapter describes how to configure and administer an NIS master server. An NIS master server holds the source files for all the NIS maps in the domain. Any changes to the NIS maps must be made on the NIS master server. The NIS master server delivers information to the NIS clients and supplies the NIS slave servers with up-to-date maps. An NIS master server can also be an NIS client.
5. Sort the temporary passwd file by user name, as follows: sort -o /etc/nis/passwd.temp -t: -k1,1 /etc/nis/passwd.temp NOTE: NIS does not require that the passwd file be sorted on any of the fields. However, sorting the passwd file makes it easier to find duplicate entries. 6. Examine the /etc/nis/passwd.temp file, and remove the duplicate entries for the same user name. NOTE: 7. Ensure that each user in the network has a unique user name. Sort the passwd.
NOTE: NIS does not require that the group file be sorted in any of the fields. However, sorting the group file makes it easier to find duplicate entries. 6. 7. 8. Examine the /etc/nis/group.temp file for duplicate group name entries. Merge the groups with the same name into one group to remove the duplicate entries. Sort the temporary group file by group ID, as follows: sort -o /etc/nis/group.temp -t: -k3n,3 /etc/nis/group.temp 9. Examine the /etc/nis/group.temp file for duplicate group IDs.
NOTE: If an IP address needs to be mapped to multiple host names, include them as aliases in a single entry. 7. Sort the hosts.temp file by host name, as follows: sort -o /etc/nis/hosts.temp -b -k2,2 /etc/nis/hosts.temp 8. 9. Examine the /etc/nis/hosts.temp file for duplicate host names. A host name may be mapped to multiple IP addresses only if the IP addresses belong to different LAN cards on the same host.
common practice to have both NIS client and NIS server on the same system, it is not mandatory. You can maintain them on different systems. 6. Enter the following command to create the NIS maps for the domain: /usr/sbin/ypinit -m The ypinit script prompts for the names of the slave servers. 7. 8. Enter the names of the slave servers. Run the following command to set up the system as a client: /usr/sbin/ypinit -c 9. Copy the /etc/nsswitch.nis file to /etc/nsswitch.conf, as follows: cp /etc/nsswitch.
networks.byname mastername ipnodes.byaddr mastername ipnodes.byname mastername hosts.byaddr mastername hosts.byname mastername group.bygid masternamegroup.byname mastername passwd.byuid mastername passwd.byname mastername ypservers mastername Where: mastername is the name of the local host. For example, in an NIS network, if the hostname of the master server is mammoth, mastername in the previous output will be replace by the hostname, that is, mammoth.
7. Enter the following commands to regenerate the NIS passwd maps from the /etc/passwd.yp file: cd /var/yp /usr/ccs/bin/make passwd The make passwd command generates both the passwd.byname and the passwd.byuid maps, and copies them to the slave servers. If the slave servers are not up and running yet, enter make with the NOPUSH flag set to 1: cd /var/yp /usr/ccs/bin/make NOPUSH=1 passwd For more information, see the following manpages: passwd (4), make (1), ypmake (1M), and ypinit (1M).
Where: IP_address address_mask Specifies the Internet address of the NIS client, the NIS slave server, or the subnet that requests the NIS information or transfers from the NIS master server Indicates the important bit fields in the IP_address. If a bit is set in the address_mask field, the corresponding bit in the source address of any incoming NIS requests must match the same bit in the IP_address field.
3. Enter the following commands to generate the map and to push it to the slave servers: cd /var/yp /usr/ccs/bin/make mapname If the slave servers are not running, enter the following command with the NOPUSH flag set to 1, as follows: cd /var/yp /usr/ccs/bin/make NOPUSH=1 mapname This procedure is effective for all NIS maps except the ypservers map, which does not have a source file.
auto.tools: @if [ $(NOPUSH) ]; then $(MAKE) $(MFLAGS) -k \ $(YPDBDIR)/$(DOM)/auto_tools.time DOM=$(DOM) DIR=$(DIR); \ else $(MAKE) $(MFLAGS) -k $(YPDBDIR)/$(DOM)/auto_tools.time \ DOM=$(DOM) DIR=$(DIR) NOPUSH=$(NOPUSH);fi 4. Enter the following commands to generate the map: cd /var/yp /usr/ccs/bin/make auto.tools Removing an AutoFS Map from the NIS Domain In case the user wants to shift the tools repository from the NIS Master server to a different server, the auto.
3. Enter the following command to create an editable ASCII text file from the ypservers map: /usr/sbin/makedbm -u ypservers > tempfile 4. Add the name of the new server to the ASCII tempfile file, using a text editor. For example, run the following command at the command prompt to specify the slave server in the marketing domain: # vi /var/yp//tempfile In the vi editor window, enter the host name of the slave server. For example: ocelot 5.
transparent to the user or application and can be achieved without any change to the /etc/nsswitch.conf configuration file. To enable the DNS Forwarding mode on the NIS server, complete the following steps: 1. 2. Log in to the NIS master server as superuser. Enter the following command to stop the NIS server: /sbin/init.d/nis.server stop 3. Add the -d option to the YPSERV_OPTIONS variable in the /etc/rc.config.d/namesvrs file as follows: YPSERV_OPTIONS=”-d” 4.
NOTE: The pwconv and pwunconv commands enable you to switch the system between the shadow password mode and the normal mode. 4. Enter the following commands to restart the NIS server: /sbin/init.d/nis.server stop /sbin/init.d/nis.server start NOTE: The encrypted password information used for creating NIS password maps is present in the shadow file and is visible in the passwd maps (passwd.byname and passwd.byuid).
If you specify a log file with the -l option, ypserv shares the same log file with the other NIS daemons. 3. Enter the following command to restart the NIS server: # /sbin/init.d/nis.server start For more information, see ypserv (1M). • Configuring ypbind Logging 1. Enter the following commands to stop the NIS client: # /sbin/init.d/nis.client stop 2. Add the -l logfile option to the YPBIND_OPTIONS variable in the /etc/rc.config.
4 Configuring and Administering an NIS Slave Server This chapter describes how to configure an NIS slave server. An NIS slave server provides information to the NIS clients and takes the load off the NIS master server. The NIS maps are created on the NIS master server and then transferred to the slave servers. Changes to the NIS maps must be made on the NIS master server, which then transfers the updated copies of the maps to the NIS slave servers.
root::0:rootl,sam other::1: bin::2: sys::3: adm::4: daemon::5: mail::6: lp::7: For more information, see group (4). Enabling the NIS Slave Server Capability To enable the NIS slave server capability, complete the following steps: 1. Enter the following command on the NIS master server to verify that the NIS master server is configured and running NIS: /usr/bin/ypwhich 2. 3. Log in as a superuser to the host that is designated as the slave server.
To receive map updates from the NIS master server, you must add the new slave server to the ypservers map on the master server. For information about adding an NIS slave server to the NIS domain, see “Adding a Slave Server to the NIS Domain” (page 30) . For more information see domainname (1), ypinit (1M), ypfiles (4), and Appendix A (page 49).
Allowing Selected Clients to Access the Slave Server To selectively allow clients to access the slave server and prevent access by other clients, complete the following steps: 1. On the NIS slave server, create the following file if it does not exist: /var/yp/securenets 2.
5 Configuring and Administering an NIS Client An NIS client is a system that obtains its configuration information from either an NIS master server or an NIS slave server.
sys::3:root,uucp adm::4:root,adm daemon::5:root,daemon mail::6:root lp::7:root,lp tty::10: nuucp::11:nuucp users::20:root nogroup:*:-2: smbnull::101: hpsmh::102: sshd::103: nisg::104: nisgr::105: For more information, see group (4). Enabling the NIS Client Capability To enable the NIS client capability, complete the following steps: NOTE: Back up the NIS configuration file /etc/rc.config.d/namesvrs file and the /etc/nsswitch.conf file before performing the steps described in this section. 1.
Verifying the NIS Client Configuration To verify the NIS client configuration, complete the following steps: 1. 2. Log in to the NIS client as superuser. Enter the following command to list the NIS maps and the master server that serves the maps: /usr/bin/ypwhich -m The ypwhich -m command lists all the NIS maps available to the client, and displays the name of the master server that serves each map. An output similar to the following is displayed: auto.master mastername netid.byname mastername publickey.
The yppasswd command is a link to the passwd -r nis command. It modifies the passwd file on the NIS master server, regenerates the NIS passwd maps from the updated passwd file, and replicates the NIS passwd maps on the slave servers. For more information, see yppasswd(1), yppasswdd(1M), passwd(1), ypxfr(1M), and yppush(1M). Preventing an NIS Client from Binding to Unknown Servers To prevent an NIS client from binding to unknown servers, complete the following steps: 1.
To bind an NIS client to any of the specified NIS servers on a different subnet, complete the following steps: 1. 2. Log in to the NIS client as superuser. Enter the following command, to construct a list of bind servers: #/usr/sbin/ypinit -c The ypinit command when invoked with the -c option, configures the local host as an NIS client so that the NIS client attempts to bind to a particular NIS server.
6 Troubleshooting NIS This chapter discusses the following known problems and workarounds with NIS: • • • • • “NIS “Server Not Responding” Message” (page 45) “A User Cannot Log In” (page 45) ““Unknown Host” Message” (page 46) “An NIS Client Cannot Bind to a Server” (page 47) “NIS Returns Incorrect Information” (page 48) NIS “Server Not Responding” Message If the message “NIS Server Not Responding” is displayed, you can do the following: □ Run the /usr/sbin/ping command on the NIS client to ensure that th
transfers during intervals when the network load is low, and advise users to make their password changes during these intervals. □ Run the following command on the NIS client to determine the master server that provides the passwd map to the client: /usr/bin/ypwhich -m passwd If the server does not respond, see “NIS “Server Not Responding” Message” (page 45) in the troubleshooting chapter.
The trace will indicate the name services (BIND, NIS, or /etc/hosts) that were queried and in what order. If the host is not performing lookups the way you want, see “NFS Services Administrator’s Guide”, for instructions on configuring the Name Service Switch. □ Run the following command on the NIS client to determine which master server provides the hosts map: /usr/bin/ypwhich -m hosts If the server does not respond, see “NIS “Server Not Responding” Message” (page 45).
ypwhich: clntudp_create error RPC_PROG_NOT_REGISTERED You can do the following: • Check if the ypbind process is running: ps -ef | grep ypbind • If ypbind is not running, run the following command to start all the NIS client processes: /sbin/init.d/nis.
A Sample NIS Session This appendix discusses a sample configuration for an NIS network, where we configure an NIS master (hostname: mammoth), NIS slave (hostname:ocelot) and an NIS client for the domain marketing. The following topics are addressed here: • “Configure an NIS Master Server” (page 49) • “Configure an NIS Slave Server” (page 50) • “Configure an NIS Client” (page 51) Configure an NIS Master Server 1. Modify the /etc/rc.config.
If it is desired that the NIS client has to bind to a particular NIS server, a list of NIS servers must be constructed first. Continue to add the names of NIS servers in the order of preference, one per line. When done with the list, press Ctrl+D or the Return key on a line by itself. next host to add: mammoth next host to add: The current list of ypservers looks like this: mammoth Is this correct? [y/n: y] y Type y or n to confirm the output. NOTE: above. 4.
The current list of yp servers looks like this: mammoth ocelot Is this correct? [y/n: y] y Type y or n to confirm the output. NOTE: above. 4. Ensure that the /etc/hosts file has appropriate entries for the NIS servers added Enter the following command, to start the NIS slave server: #/sbin/init.d/nis.server start 5. Enter the following command to start the NIS client: #/sbin/init.d/nis.
B NIS Configuration File /etc/rc.config.d/namesvrs The /etc/rc.config.d/namesvrs file is the main NIS configuration file, through which the NIS services can be enabled or disabled and appropriate options can be provided for the NIS service. It also contains a list of the NIS maps built in the domain. Following is a listing of the/etc/rc.config.d/namesvrs file: # # @(#)B.11.31_LR namesvrs $Revision: $ # # (C) Copyright 1998, 2000-2006 Hewlett-Packard Development Company, L.P.
YPPASSWDD_OPTIONS="/etc/passwd -m passwd PWFILE=/etc/passwd" KEYSERV_OPTIONS="" YPUPDATED_OPTIONS="" YPXFRD_OPTIONS="" YPSET_ADDR="" LONGNAMES_OPTIONS="group.bygid.dir group.bygid.pag group.byname.dir \ group.byname.pag hosts.byaddr.dir hosts.byaddr.pag \ hosts.byname.dir hosts.byname.pag networks.byaddr.dir \ networks.byaddr.pag networks.byname.dir networks.byname.pag \ passwd.byname.dir passwd.byname.pag passwd.byuid.dir \ passwd.byuid.pag protocols.byname.dir protocols.byname.pag \ protocols.bynumber.
C Using NIS in Compat Mode This section describes how to use Compat Mode, also called the Compatibility Mode, for controlling the name services used to obtain user and group information. If you specify compat as a name service in the /etc/nsswitch.conf file for the passwd: and group: entries, then NIS consults the local /etc/passwd or /etc/group file. Any lines in the /etc/passwd or /etc/group file beginning with a plus (+) or a minus (-) sign directs the lookups to NIS.
Also, make sure your /etc/nsswitch.conf file specifies compat as the name service for passwd. The plus sign (+) causes processes to consult NIS for any user information not found in the local /etc/passwd file. For more information about the entries in the /etc/passwd file, see passwd(4). CAUTION: An asterisk (*) in the password field prevents all NIS users from logging in when NIS is running.
Logging in Issue with NIS This section suggests a way to correct a common logging in problem encountered with NIS. If you are using NIS compat mode, make sure the NIS escape entry in the /etc/passwd file on the client does not have an asterisk in the password field.
Index Symbols M + (plus sign) in group file, 39 /etc/rc.config.
nsquery, 47 P passwd command, 41 passwd database, 41 on NIS client, 39 password, changing with NIS, 41 PATH, for NIS, 24, 40 ping, 45 plus sign (+) in group file, 39 S securenets file, 27, 38 security on NIS master server, 27 on NIS slave server, 38 sendmail aliases, 14 server not responding, NIS, 45 slave server, NIS adding, 30 choosing a host, 19 getting maps from master, 37 number of, 19 number of servers, 19 removing, 31 restricting access to, 38 Sun ONC/NFS Makefile vs.