
HP-UX LAN Administrator's Guide (Feburary 2007)
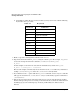

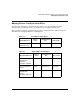
Table Of Contents
- About This Document
- 1 New for the HP-UX 11i v3 Release
- 2 Installing HP-UX LAN
- 3 Configuring HP-UX LAN Using SAM
- 4 Manually Installing and Configuring HP-UX LAN
- 5 Troubleshooting HP-UX LAN
- Troubleshooting Overview
- Troubleshooting Q & A
- LAN Interface Card Statistics
- 100Base-T Checklist
- Diagnostic Flowcharts
- Flowchart 1: Configuration Test
- Flowchart 2: Configuration Test continued
- Flowchart 3: Configuration Test continued
- Flowchart 4: Network Level Loopback Test
- Flowchart 5: Network Level Loopback Test continued
- Flowchart 6: Transport Level Loopback Test (using Internet Services)
- Flowchart 7: Link Level Loopback Test
- Flowchart 8: LAN Connections Test
- Flowchart 9: Gateway Remote Loopback Test
- Flowchart 10: Gateway Remote Loopback Test continued
- Flowchart 11: Subnet Test
- 6 LAN Resources
- 7 Network Addressing
- Overview of Network Addressing Schemes
- Networking Terminology
- Network Addresses and Node Names
- Internet Addresses
- Subnet Addresses
- Configuring Gateways on Fixed-Length Subnets
- Variable-Length Subnet Addressing
- Configuring Gateways on Variable-Length Subnets
- Configuring Gateways on Supernets
- IP Multicast Addresses
- Virtual IP (VIP) Addresses
- CIDR - Classless Inter-Domain Routing
- 8 LAN Device and Interface Terminology

Configuring HP-UX LAN Using SAMDRAFT COPY
Reconfiguring IP Addresses
Chapter 316
Reconfiguring IP Addresses
If you have rearranged any network interface cards in the system you may need to reconfigure
the IP addresses. Follow the steps below:
1. At the HP-UX prompt, type: sam
2. At the main menu select the Networking and Communications item.
3. Select the Network Interface Cards item.
4. Verify the IP addresses of all the adapters in the system by reviewing the Card Name,
Hardware Path, and Internet Address displayed in the Network Interface Cards window.
5. For adapters with incorrect IP addresses, follow the steps below:
a. Select the adapter you wish to modify.
b. Select Modify from the “Actions” menu.
c. Modify the Internet Address and select ok.