
HP-UX LAN Administrator's Guide (Feburary 2007)


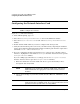

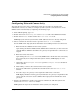

Table Of Contents
- About This Document
- 1 New for the HP-UX 11i v3 Release
- 2 Installing HP-UX LAN
- 3 Configuring HP-UX LAN Using SAM
- 4 Manually Installing and Configuring HP-UX LAN
- 5 Troubleshooting HP-UX LAN
- Troubleshooting Overview
- Troubleshooting Q & A
- LAN Interface Card Statistics
- 100Base-T Checklist
- Diagnostic Flowcharts
- Flowchart 1: Configuration Test
- Flowchart 2: Configuration Test continued
- Flowchart 3: Configuration Test continued
- Flowchart 4: Network Level Loopback Test
- Flowchart 5: Network Level Loopback Test continued
- Flowchart 6: Transport Level Loopback Test (using Internet Services)
- Flowchart 7: Link Level Loopback Test
- Flowchart 8: LAN Connections Test
- Flowchart 9: Gateway Remote Loopback Test
- Flowchart 10: Gateway Remote Loopback Test continued
- Flowchart 11: Subnet Test
- 6 LAN Resources
- 7 Network Addressing
- Overview of Network Addressing Schemes
- Networking Terminology
- Network Addresses and Node Names
- Internet Addresses
- Subnet Addresses
- Configuring Gateways on Fixed-Length Subnets
- Variable-Length Subnet Addressing
- Configuring Gateways on Variable-Length Subnets
- Configuring Gateways on Supernets
- IP Multicast Addresses
- Virtual IP (VIP) Addresses
- CIDR - Classless Inter-Domain Routing
- 8 LAN Device and Interface Terminology

Configuring HP-UX LAN Using SAMDRAFT COPY
Configuring the Network Interface Card
Chapter 310
Configuring the Network Interface Card
NOTE Make sure the LAN card and driver are installed in the system before you use
SAM to configure the software.
Log in as root and do the following:
1. At the HP-UX prompt, type: sam
2. Select the Networking and Communications item of the SAM main window.
3. Select the Network Interface Cards item of the Networking and Communications
window.
4. Double-click the LAN card that you want to configure from the object list.
5. Verify that the hardware path is correct for your LAN card (by comparing the hardware
path on the Configure LAN Card window with the hardware path from the output of the
commands ioscan -fdbtlan and lanscan -v).
6. If you are configuring the first logical interface for a card type (also called the “initial
interface”), highlight the card and choose Configure from the “Actions” menu to open the
Configure LAN Card window.
If you are adding logical interfaces to a card type, choose Add IP Logical Interface
from the “Actions” menu to open the Configure LAN Card window.
a. Enter the information about the LAN card. To do so, press the Tab key to move
through the data entry fields.
NOTE SAM displays the Card Name, Hardware (H/W) Path, and Station
Address fields with the appropriate values. These fields cannot be
modified.
b. Choose the Card Type of your LAN card. The default is Ethernet. SNAP802.3 can be
selected.
NOTE The Enable DHCP button specifies that the system is a Dynamic Host
Configuration Protocol (DHCP) client. If you activate this button, the IP
parameters for this system will be set using DHCP.