
HP-UX IP Address and Client Management Administrator's Guide HP-UX 11i v2, HP-UX 11i v3

2 Configuring and Administering the BIND Name Service
The Berkeley Internet Name Domain (BIND) is a distributed network information lookup service.
It allows you to retrieve host names and Internet addresses for any node on the network. It also
provides mail routing capability by supplying a list of hosts that accept mail for other hosts.
Configuration procedures to configure BIND
This chapter describes the procedure to setup a chroot environment and provides different
configuration procedures to configure BIND on your system. It discusses the following topics:
• “Setting up a chroot environment” (page 61)
• “Creating and Registering a New Domain” (page 62)
• “Configuring the Name Service Switch” (page 63)
• “Choosing Name Servers for Your Domain” (page 64)
• “Types of Resource Records” (page 65)
• “Configuring a Master Name Server” (page 66)
• “Configuring a Slave Name Server” (page 75)
• “Configuring the Caching-Only Name Server” (page 77)
• “Configuring the Resolver to Query a Remote Name Server” (page 78)
• “Configuring the Resolver to Set Timeout Values ” (page 80)
• “Starting the Name Server Daemon” (page 81)
• “Updating Network-Related Files” (page 83)
• “Delegating a Subdomain” (page 83)
• “Configuring a Root Name Server” (page 84)
• “BIND Logging System” (page 85)
• “BIND Security” (page 85)
• “Troubleshooting the BIND Name Server” (page 89)
Setting up a chroot environment
The nameserver interacts with systems available on the internet. In order to provide increased
security, BIND can be run in a chroot environment. This limits access to resources and hence
provides high security.
To setup a chroot environment:
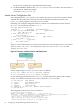
1. Log in as a root user.
2. Select a directory to setup the chroot environment. For example, /chroot/named.
If the directory does not exist, create the directory using the mkdir command.
3. Make the directory where you want to setup the chroot environment the current directory.
# cd /chroot/named
4. Create the necessary directory structure of the root in the current directory.
# mkdir -p dev etc var/run usr/lib/hpux32
5. Copy the necessary libraries from the /usr/lib directory of the root to the new root
directory.
On an Itanium system:
# cp -p /usr/lib/hpux32/libcrypto.so /chroot/named/usr/lib/hpux32/
# cp -p /usr/lib/hpux32/libc.so.1 /chroot/named/usr/lib/hpux32/
# cp -p /usr/lib/hpux32/libdl.so.1 /chroot/named/usr/lib/hpux32/
On a PA-RISC system:
Configuration procedures to configure BIND 61