
Migrating an Integrity HP-UX 11iv3 Instance to New Hardware

10
For example, if the source is running 11iv3, the target must support 11iv3 as well. The target may
need a newer revision of 11iv3, such as the March 2010 release, but not a new major release of HP-
UX.
Related Information
Additional information regarding Ignite-UX can be obtained from the Ignite-UX documentation web
site, http://www.hp.com/go/ignite-ux-docs
. This includes the following
• Ignite-UX Administration Guide (March 2010, B3921-90006)
• Successful System Cloning using Ignite-UX
• Successful System Recovery using Ignite-UX
• Installing and Updating Ignite-UX
The white paper “Using Ignite-UX with Integrity Virtual Machines” provides additional information
regarding the use of Ignite-UX to setup Integrity Virtual Machine. It is available at the following:
http://www.hp.com/go/hpux-hpvm-docs
Detailed Migration Steps for the Ignite-UX Recovery Method
Step 1: Install the latest IGNITE bundle on the Ignite-UX server
This step is particularly important if the target system includes recently released hardware, such as a
new system model or new I/O or networking interfaces. In these cases, you need the latest Ignite-UX
install kernel to boot the system.
The most recent IGNITE bundle can be obtained from the Operating Environment media that provides
support for the new hardware, or it can be downloaded from
http://www.hp.com/go/ignite-ux
The whitepaper “Successful System Cloning using Ignite-UX“, available from
http://www.hp.com/go/ignite-ux-docs
contains additional information, including details for
determining the minimum release of Ignite-UX needed for specific hardware. The simplest approach
is to use the latest available release of Ignite-UX.
Step 2: Make a recovery archive of the source system
A recovery archive of the source system, to be deployed on the target system, can be initiated on the
source system or on the Ignite-UX server, and it can be run from the command line or run from the
ignite user interface on the Ignite-UX server.
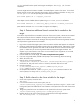
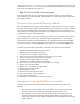
To create the recovery archive using the ignite user interface on the Ignite-UX server,
1. Run ignite.
2. Click the source system to highlight it. (If the source system is not displayed, choose Actions-
>Add New Client for Recovery).
3. Choose Actions->Create Network Recovery Archive and follow the prompts in the
wizard, specifying that the entire root volume group is to be included in the archive.
4. The Actions->Client Status choice will show the progress of the archive creation.
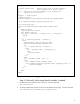
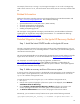
Alternatively, you can initiate a recovery from the source system with the following command:
/opt/ignite/bin/make_net_recovery -s <hostname of Ignite-UX server> -A