
HP-UX HB v13.00 Ch-13 - LVM


HP-UX Handbook – Rev 13.00 Page 26 (of 110)
Chapter 13 LVM
October 29, 2013
NOTE: For bootable disks you have to use the -B option additionally. This
preserves the fixed 2912KB space for the LVM header (see section LVM structural
information). You can find the procedure how to make a disk bootable in the section
Mirroring the root disk later in this chapter.
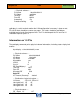
To add the PV to an existing VG do:
# vgextend vg01 /dev/dsk/c0t5d0
# vgdisplay -v vg01
Adding a new VG
1) initialize the disk if not yet done:
# pvcreate [-f] /dev/rdsk/c0t5d0
If you are using a disk on an HP Integrity server, make sure the device file specifies the
HP-UX partition number (2).
For example:
# pvcreate [-f] /dev/rdisk/disk3_p2
2) select a unique minor number for the VG:
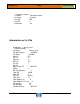
# ll /dev/*/group
crw-r----- 1 root sys 64 0x000000 Mar 12 2009 /dev/vg00/group
crw-rw-rw- 1 root sys 64 0x010000 Jan 19 2010 /dev/vgISO/group
crw-rw-rw- 1 root sys 64 0x020000 Jun 12 2009 /dev/vg_test/group
crw-r--r-- 1 root sys 128 0x001000 Jun 23 12:30 /dev/vg_local/group
crw-rw-rw- 1 root sys 128 0x060000 Jan 18 2010 /dev/vgmore/group
NOTE: The first 3 device files are LVM 1.0 volume groups and the last two
Device files are LVM 2.x volume groups
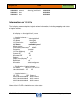
3) create the /dev directory
# mkdir /dev/vgnew
4) create a device file named group in the volume group directory with the mknod
command.
For example:
# mknod /dev/vgname/group c major 0xminor