
HP-UX HB v13.00 Ch-13 - LVM

HP-UX Handbook – Rev 13.00 Page 60 (of 110)
Chapter 13 LVM
October 29, 2013
4. (Optional) For fibre channel disks perform the replace_dsk steps
as described in the section “How to Replace Disks at Hosts with TachLite HBAs”
in the Fibre Channel chapter.
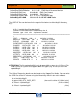
5. Restore the LVM configuration onto the new disk
# vgcfgrestore -n vg## /dev/rdsk/c#t#d#
NOTE: Since we did lvreduce -A n in step 2 the lvmconf file we are about to
restore is outdated. Fortunately, LVM is smart enough to detect this using
timestamps. The restored config is "older"... though it's considered out-dated and
gets automatically updated during re-activation.
6. Attach the new disk to the active VG
# vgchange -a y vg## or
# vgchange -a e vg## for exclusively activated Cluster VGs
NOTE: This would attach ALL unattached PVs to the VG at once. If you intend to
attach only the failed PV then use pvchange instead:
# pvchange –a y /dev/rdsk/c#t#d#
7. (Optional) Configure LIF & BDRA
If the disk is the mirror of a root disk, then you must configure the LIF/BDRA
according to the LIF/BDRA Configuration Procedure at the end of this chapter.
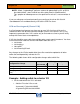
8. Sync the mirrors again
If you did not reduced the mirrors in step 2 then simply sync the mirrors to the
new disk. This may take several minutes as it will have to copy all the data from
the original copy of the data to the mirrored extents. The LV(s) are still accessible
to users applications during this command.
# vgsync vg## &
To check the progress of the synchronization you could use:
# lvdisplay -v $(find /dev/vg## -type b) | grep –c stale