
Smart Plug-in for WebLogic Server User's Guide


2-18
Chapter 2: Installing & Configuring the WebLogic Server SPI
How to Remove WLS-SPI
How to Remove WLS-SPI
The complete removal of the WebLogic SPI installation deletes all WLS-SPI
program components as well as the WLS-SPI templates. If you have customized
templates (copies of WLS-SPI default templates) residing in other OVO
template groups, you should remove them as well. If you are upgrading
WLS-SPI, complete only the first section “Removing WLS-SPI software from the
Management Server.”
TASK 1: REMOVE WLS-SPI SOFTWARE FROM THE
MANAGEMENT SERVER
1. Open a terminal window and log on as root.
2. In the terminal window run
swremove by entering:
/usr/sbin/swremove WLSSPI
3. To ensure removal of all WLS-SPI files from the management server, enter:
ll -R /var/opt/OV/share/databases/OpC/mgd_node/customer
Delete any file in any directory below
var/opt/OV/share/databases/OpC/mgd_node/customer that
begins with
wasspi.
NOTE If you are upgrading WLS-SPI, STOP HERE!
The
swremove command removes the files from the file system only. The
WLS-SPI templates are still in the OVO data repository and must be deleted
manually. First, however, they (and the WLS-SPI software) must be de-assigned
from the managed nodes.
TASK 2: REMOVE WLS-SPI SOFTWARE FROM NODE
GROUPS AND MANAGED NODES
Before beginning the procedure below, de-assign the WLS-SPI template groups
that you have deployed from the node groups.
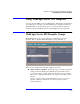
1. Open the Node Bank and from the Actions menu select Agents
→Assign