
HP-UX 11i v2 Installation and Update Guide, December 2007


Cold-Installing HP-UX 11i v2 Using Media
Cold-installing HP-UX 11i v2 from Media
Chapter 596
Task 3: Configuring Your Installation
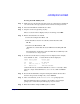
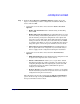
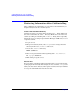
At this point, the system displays the Basic tab of the Ignite-UX itool
Terminal User Interface (TUI) for the HP-UX Advanced installation
process. The
Basic tab shows all the basic information for setting up the
file system and for loading the Operating Environment. It also allows
you to configure languages, locale, and keyboard requirements.
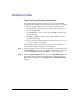
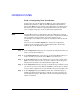
NOTE Selecting Go! initiates an installation. Since the Go! button is always
available, it may be selected from any of the tabs to begin the installation
process with the current settings. If you don't need to do any
customization, select Go! now to begin the installation with the default
settings.
You can also select
Reset Configuration to change the configuration
settings for the currently-selected configuration back to the default
settings. You can do this from any tab.
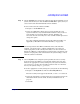
Step 1. In the
Configurations field select an overall system configuration that you
want to use for this installation.
Step 2. In the
Environments field, select the type of Operating Environment you
want to install on your system. Press
Enter to view the choices.
Step 3. In the
Root Disk field select the disk to store your root file system. Press
Enter to view the choices. If you are unsure of what to choose, keep the
default selection that has been determined by Ignite-UX.
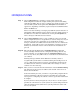
Step 4. In the
File System field, select the type of volume manager and file system
you want to use for your root disk. Press
Enter to view the choices. Unless
you have other requirements, use the default value chosen by Ignite-UX.
Step 5. In the
Languages field, press Enter to browse the available languages,
marking the desired selections.You can make any of the selections the
system default language. This will become the system default language
after it is installed.