
Using the HP DTC 16RX Manager


23
Installing the software on HP-UX 9.X systems
3
Running update
The software is installed using the update utility. Refer to Installing and Updating
HP-UX before you use this utility.
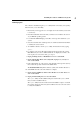
1 Ensure that you are logged in as root in single-user mode and that you are at the
root directory.
2 Read the media labels and ensure that your fileset version matches the version
of your HP-UX operating system.
3 Load the DTC 16RX Manager product files on the tape drive attached to your
system.
4 Note the device file name of that tape drive. You will need this information later
to identify the source location.
5 To install the software, run the update utility in interactive mode by typing:
update
6 Look at the source device file name displayed in the upper left portion of the
Main Menu. If your source is different than the one displayed, continue to the
next step. If your source is the same, go to step 11.
7 Highlight Change Source or Destination and click on Select Item.
8 Highlight From Tape Device to Local System (highlighted by default) and
click on Select Item.
9 Follow the instructions on the screen to enter the name of the tape drive (device)
that contains the product software in the Source field.
The Destination Directory field contains a / (slash) and should be left as it is.
10 Select Done when the source information is complete.
11 Highlight Select All Filesets on the Source Media from the Main Menu and
click on Select Item.
12 Highlight Start loading now and select Select Item.
The update utility checks available disk space and then asks you to confirm
that you want to install the filesets.
The update utility loads the software and runs installation scripts to create all
the required, directories, files and system variables. Proceed to the next section
to verify the installation.