
NIO CommKit Host Interface Installation and System Administration Manual


2-16
Installing the NIO CommKit Host Interface
Running the dkdiag Diagnostic Test
Running the dkdiag Diagnostic Test
The dkdiag program provides a series of hardware diagnostic tests that ver-
ify that the Datakit interface board is installed correctly. You can use the
dkdiag program in either local or remote loopback mode.
If the Datakit interface board is connected to the CPM-HS module, use the
remote loopback mode. Use the local loopback mode when the Datakit inter-
face board is not connected to a CPM-HS board in the VCS. Local loopback
mode is recommended for the most accurate diagnostic results.
The dkdiag program is located in the /opt/dk/sbin directory.
Using Remote Loopback Mode
1 Log in as superuser.
2 Run dkdiag:
# dkdiag -a
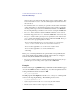
3 Review the output of dkdiag. It should look like the following lines:
Warning, Diagnostics will logoff users.
Continue? y/n (default n <enter>): y
--------------------------------------
Diagnostic Summary (1 Iteration Completed):
Phase 0: Dump Registers..................... Pass
Phase 1: Read/Write Control Register........ Pass
Phase 2: FIFO Flags......................... Pass
Phase 3: FIFO Operation..................... Pass
Phase 4: Control Null Removal............... Pass
Phase 5: Interrupts......................... Pass
Phase 6: Board Reset and Initialization..... Pass
Phase 7: Transmit FIFO Reset................ Pass
Phase 8: Receive FIFO Reset................. Pass
--------------------------------------
Exit Diagnostics Mode
All tests should complete without errors. You should see the word Pass
on each line.
If dkdiag reports any errors, perform the following steps.
4 Make sure that all connections and cables are secure.
5 Reset the interface board:
# dkmaint -r