
NIO CommKit Host Interface Installation and System Administration Manual

2-13
Installing the NIO CommKit Host Interface
Installing the CommKit Software
Installing the CommKit Software
1 Make sure that the desired HP-UX version is installed on the host server.
2 Make sure that the Streams and Streams-TIO filesets are installed.
3 Make sure that the Datakit interface board is installed in the host server.
4 Back up any existing CommKit or Datakit files that are specific to your site-—
for example, dksrvtab (or srvtab files), dkhosts, and dkuidtab.
5 Place the DDS tape containing the CommKit software in the tape drive.
6 Log in as superuser.
7 Make sure that all other users are logged off the system, because the system will
be rebooted in the next step.
8 To install the CommKit software from the tape, enter:
# swinstall -xautoreboot=true -s /deviceFileName Z7126A
The swinstall command performs the entire installation, including building a
new kernel (either 32-bit or 64-bit), creating the necessary device files, reboot-
ing the system, and starting the CommKit server for the first interface.
Wait for the system shutdown and reboot to occur. When you see the login
prompt, the NIO CommKit Host Interface is working.
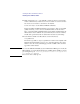
9 Watch the system messages that appear as the system reboots:
The system messages should be similar to the following:
Beginning I/O System Configuration.
12 dknio0
48 lan3
52 scsil
52.0 target
52.4 target ...
The second line displays the name of the Datakit interface board, dknio0, which
indicates that the host server has located the board, and the CommKit software
has initialized it correctly. You should see a line for each Datakit interface board
you have installed. If you do not, you may need to reinstall that board.
10 Remove the DDS tape from the tape drive.