
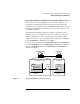
NetWare 4.1/9000 Print Services


8-11
Working with Print Device Definitions and Printer Forms
Working with Print Device Definitions
The “Defined Print Devices” list is displayed.
3 Select the device definition you want to export from the “Defined Print Devices”
list.
The “Destination Directory” window appears. The SYS:PUBLIC directory is
the default if PRINTDEF was started from a network drive.
4 Press <Insert>.
The “Network Directories” list box appears.
5 Select the “..” entry at the top of the list. Continue pressing <Enter> until the
“Volumes” window appears.
This window lists the servers and volumes you are currently attached to, and
provides the username through which you made the attachment.
6 Select the NetWare server you want to export to.
A list of volumes for the destination NetWare server appears.
7 Select the volume and continue selecting directories to complete the path.
8 After you have selected the complete directory path, press <Esc> and then
<Enter>.
9 Type the name you want to give the file in the “Export File Name” box and press
<Enter>.
The name can be up to eight characters long but cannot include an extension.
You will probably want to use the name of the printer so the file is easily
recognizable (for example, HP_LASER).
The file is created with a .PDF extension and is placed in the specified directory.