
Managing Systems and Workgroups: A Guide for HP-UX System Administrators


Administering a System: Managing Disks and Files
Managing File Systems
Chapter 6 635
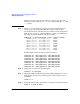
NOTE The values in the example represent a boot disk with three partitions:
an EFI partition, an HP-UX partition, and an HP Service partition.
Boot disks of earlier HP Integrity Servers may have an EFI partition
of only 100MB and may not contain the HPSP partition.
b. Partition the disk using idisk and your partition description file:
idisk -f /tmp/idf -w /dev/rdsk/c3t1d0
c. To verify you can run:
idisk /dev/rdsk/c3t1d0
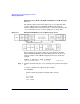
Step 2. Use the insf command with the -e option to create the device files for all
the partitions. For example:
insf -e -H 0/18/1/2/0.0.1.0
You should now have eight device files for this disk:
/dev/[r]dsk/c?t?d?
(This refers to the entire disk)
/dev/[r]dsk/c?t?d?s1
(This refers to the EFI partition)
/dev/[r]dsk/c?t?d?s2
(This will be the HP-UX partition)
/dev/[r]dsk/c?t?d?s3
(This refers to the Service partition)
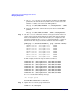
Step 3. Use pvcreate to make the HP-UX partition of the disk an LVM managed
disk:
pvcreate -B /dev/rdsk/c3t1d0s2
Step 4. Add the disk to vg00:
vgextend vg00 /dev/dsk/c3t1d0s2
Step 5. Place the boot files on the disk using mkboot:
mkboot -e -l /dev/rdsk/c3t1d0
Step 6. Copy any autoboot file from the original boot disk to this one.