
Installing and Administering Internet Services

Chapter 3 119
Configuring and Administering the BIND Name Service
Configuring a Secondary Master Name Server
on the secondary server.
3. On the secondary server, rename /etc/boot.sec.save or
/etc/boot.sec to /etc/named.boot.
4. Copy the files /etc/named.data/db.cache and
/etc/named.data/db.127.0.0 from the primary server to the
secondary server.
The format of the data files copied from the primary master server are
described in “Configuring a Primary Master Name Server” on page 86.
An example boot file for a secondary master server is shown in “To
Create the Secondary Master Server’s Data Files Manually” on page
119.
For more information on hosts_to_named, type man 1M
hosts_to_named at the HP-UX prompt.
To Create the Secondary Master Server’s Data Files
Manually
1. Copy the files /etc/named.boot, /etc/named.data/db.cache, and
/etc/named.data/db.127.0.0 from the primary server to the
secondary server.
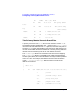
2. On the secondary server, use a text editor to make the following
changes to /etc/named.boot:
• In every primary line except the one containing db.127.0.0,
replace the word primary with the word secondary.
• In every secondary line, add the internet address of the primary
server after the domain name.
• If you do not want your secondary server to store backup files on
disk, delete the last field of every secondary line (the field that
specifies the file name).
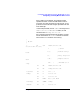
Following is an example boot file from a secondary master server:
; domain server address
backup file
; type
;
directory /etc/named.data ;running directory for named