
HP-UX HB v13.00 Ch-15 - Serviceguard

HP-UX Handbook – Rev 13.00 Page 89 (of 108)
Chapter 15 Serviceguard
October 29, 2013
Use of an LVM Lock Disk as the Cluster Lock
Specifying a Lock Disk
The lock must be accessible to all nodes and must be powered separately from the nodes
To create a lock disk, enter the lock disk information following the cluster name. The lock disk
must be in an LVM volume group that is accessible to all the nodes in the cluster.
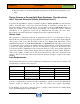
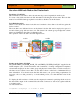
Lock Disk Operation
When a node obtains the cluster lock, this area is marked so that other nodes will recognize the
lock as “taken.”
The lock disk is not dedicated for use as the cluster lock; the disk can be employed as part of a
normal volume group with user data on it. The cluster lock volume group and physical volume
names are identified in the cluster configuration file.
The operation of the lock disk is shown in Figure below.
Setting up the cluster lock disk
The default FIRST_CLUSTER_LOCK_VG and FIRST_CLUSTER_LOCK_PV supplied in the
ASCII template (See ”Useful Procedures and Commands”, Creating configuration templates)
created with cmquerycl are the volume group and physical volume name of a disk connected to
all cluster nodes; if there is more than one, the disk is chosen on the basis of minimum failover
time calculations. You should ensure that this disk meets your power wiring requirements. If
necessary, choose a disk powered by a circuit which powers fewer than half the nodes in the
cluster.
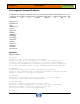
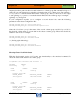
To display the failover times of disks, use the cmquerycl command, specifying all the nodes in
the cluster.The output of the command lists the disks connected to each node together with the
re-formation time
associated with each.
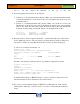
root@Node1:/# cmquerycl -v -n Node1 -n Node2
nodeA
nodeB