
HP-UX HB v13.00 Ch-13 - LVM


HP-UX Handbook – Rev 13.00 Page 55 (of 110)
Chapter 13 LVM
October 29, 2013
NOTE: The replacement disk must be the same product ID as the replaced one. HP
often uses different manufacturers for disks having the same product number. The
hotswap procedures will not update the disk driver's internal information to that of the
replaced disk. The replacement disk will have the same capacity and blocksize as the
defective disk because they have the same product number. The only field that could
be incorrect is the string specifying the vendor's name. This will not affect the
behavior of the LVM. If it is desired to update the manufacturers' name, then the
disk's volume group must be deactivated and reactivated.
Replacing a disk in a Serviceguard environment makes no real difference. Even
replacing a cluster lock disk is no problem, since the LVM configuration backup contains
all needed information about it. This is true as long as vgcfgbackup was run after
configuring the cluster. Consult the Serviceguard Chapter if you are unsure.
ATTENTION: If this is an Itanium system (UX 11.20, UX 11.22, UX 11.23) you need to
take care of the new disk partitioned layout. The first partition (c#t#d#s1) contains the
EFI (500MB). The former LVM disk is now located at partition 2 of the disk
(c#t#d#s2). For details on how to replace an Itanium root disk refer to the Itanium
Chapter.
Identifying the failed disk
First of all you have to figure out which disk actually failed. Do not rely on the output
of LVM’s display commands only! Especially in mirrored configurations you have to
be very careful.
Here are some approaches how to check for typical symptoms of failed disks.
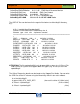
Use the ioscan(1M) command (ioscan –fCdisk) to have a look at the disk’s S/W
state. Only disks in state CLAIMED are currently accessible by the system. Disks
in other states like NO_HW are of course suspicious. This is also true for disks
that are completely missing in ioscan’s result. If the disk is CLAIMED then at
least its contoller is responding.
The next step could be a test with diskinfo(1M) (diskinfo /dev/rdsk/cXtXdX).
The reported size must be >0, otherwise the device is not ready for some reason.
Although being more time consuming, trying to read the disk with dd(1)
completely (dd if=/dev/rdsk/c#t#d# of=/dev/null bs=256K) or partially (dd
if=/dev/rdsk/c#t#d# of=/dev/null bs=1024K count=10) is also a useful
indicator. No I/O errors must be reported here.
Use hardware diagnostic tools (like MESA diagnostics, mstm/cstm commands) to
get detailed diagnostic information about the disk. These tools offer the most
conclusive information.