
HP-UX HB v13.00 Ch-06 - Ignite-UX


HP-UX Handbook – Rev 13.00 Page 49 (of 58)
Chapter 06 Ignite-UX
October 29, 2013
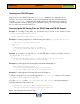
The system will be booted from the Ignite-UX kernel on the tape and then the Ignite-Ux server
will be contacted to proceed with the installation.
Typically the tape is created on the Ignite-UX server, because it contains Ignite-UX server
specific information from the INSTALLFS file (edited with instl_adm).
The tape can also be used if you have several lan cards and you want to use another than the
built-in lan card for installation. You will be asked which lan card you want to initialize.
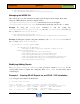
1) Create a DDS1 device file for the tape drive first.
# /usr/sbin/ioscan -fC tape
Class I H/W Path Driver S/W State H/W Type Description
=======================================================================
tape 0 8/16/5.6.0 stape CLAIMED DEVICE HP C1533A
# /usr/sbin/mksf -v -H 8/16/5.6.0 -b DDS1 -n –a
The device file will be called something like /dev/rmt/c1t6d0DDS1n.
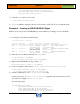
2) Check your instl_adm settings and edit them if necessary.
# /opt/ignite/bin/ instl_adm -d > /tmp/config_file
# /usr/bin/vi /tmp/config_file
server="15.140.10.59"
netmask[]="0xfffff800"
3) Create the boot tape
# /opt/ignite/bin/make_boot_tape -f /tmp/config_file \
-d /dev/rmt/c1t6d0DDS1n –v
4) Proceed to boot from tape to contact the Ignite-UX server.
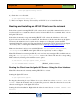
Performing a non-interactive Ignite-UX Installation
Note: The client will be installed without any user interaction.
1) Adjust the install boot kernel /opt/ignite/boot/INSTALLFS of the Ignite-UX server. Read
the current configuration and save it to a defaults file
# /opt/ignite/bin/instl_adm -d >/var/opt/ignite/defaults