
HP System Management Homepage Installation Guide, May 2005
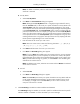

Note: If Next is selected without adding any IP addresses to either theInclude or Exclude
lists, a warning message appears stating, IP Restricted Login checkbox will
be marked as disabled. Do you want to proceed without adding any
IP Address restrictions? If you select OK, the IP Restricted Login option on
the IP Restricted Login dialog box is deselected, and the Install Preview dialog box
appears.
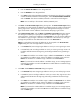
12. Click Next. The Install Preview Panel appears. The Install Preview Panel lists the location
where the System Management Homepage is installed, the amount of space the installation
requires, and the summary of the options that you specified during the installation.
13. Click Next. The installation process is started.
Note: During the installation of the System Management Homepage, Cancel is disabled. If
you click the X in the upper-right corner of the box, an error message appears, stating the
current operation cannot be canceled.
14. Click Finish to complete the installation.
Installing the System Management
Homepage for Windows Silently
The System Management Homepage installation for Windows enables you to silently install the
System Management Homepage. After the installation is complete, you can configure the System
Management Homepage settings.
Generating a setup.iss file
To generate your own setup.iss:
1. Run the following CLI:
setup.exe /r
2. The System Management Homepage Installation interface appears and records your selections.
3. The setup.iss file is placed into the Windows directory. You can move this file to the location
of your choice.
Installing silently using the CLI
To install silently using the CLI:
setup.exe /s /f1<full_path_to_setup.iss_file>
For example, you might enter setup.exe /s /f1c:\mydirectory\setup.iss.
Note: There are no spaces between f1 and the path.
27
Installing on Windows