
HP Instant Support Enterprise Edition Client Installation and Upgrade Guide


Installing HP ISEE on Windows Clients
Installing or Upgrading an Individual Windows Client
Appendix C
73
Installing or Upgrading an Individual Windows Client
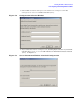
1. Browse to the directory where you downloaded the ISEEPlatform.exe, during the
ISEE Client download (see “Downloading ISEE Client Software” on page 19). Double
click ISEEPlatform.exe to extract the contents.
2. Open a command prompt by clicking [Start] and selecting Run.
3. Enter command in the Open field and click [OK].
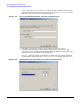
4. Run the following command:
c:\temp\ISEEPlatform\setup.exe /verbose“<path\log_name>”
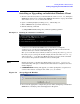
Example C-1 Running the Installation Command
ISEEPlatform is the default subdirectory created when you unzip the
ISEEPlatform.exe file. If you changed the directory path, you must enter the
alternate directory to run the command in Step 4.
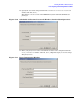
The <path> is the directory to which you will save your log file, and <log_name> is
the name you give your log file. In this example, the file was names install.log
and saved to the c:/temp directory. Make sure there is no space in the command
above between the quotation mark after verbose and the path.
NOTE During an Upgrade, a window may display with a Components registering
status bar. It may take up to 5 minutes before this status bar completes and a new
window displays.
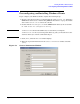
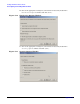
5. UPGRADE ONLY: During and upgrade, you will be prompted to accept the new
version of the software (see Figure C-2). Click [Yes] to continue.
Figure C-2 Accept Upgrade Window
6. Proceed to the appropriate configuration process either, Configuring an Individual
ISEE Client or Verifying a Successful Upgrade in Chapter 2.