
Graphics Administration Guide (October 2009)

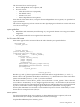

To configure a multi-screen layout, first select the devices you want to include. In the X Server
Configuration panel click the mouse on the first device, and [Ctrl]-click on the others. All the
devices you want to combine into a multi-screen configuration should now be highlighted. Then
use the Modify Multi-Screen Layout menu item in the Actions menu to finish the configuration.
SLS is a mechanism for treating homogeneous multi-display configurations as a single logical
screen. This allows the moving/spanning of windows across multiple physical monitors. The
word homogeneous is included because SLS only works if the graphics devices included in the
SLS Configuration are of the same type.
Enabling an SLS configuration is similar to enabling a multi-screen layout. First select the devices
you want to combine into an SLS configuration. In the X Server Configuration panel click the
mouse on the first device, and [Ctrl]-click on the others. All the devices you want to combine
into an multi-screen configuration should now be highlighted. Then from the "Actions" menu,
choose the Single Logical Screen (SLS) -> Create SLS... menu item to finish the configuration.
The "X Server Configuration" window should now show a single icon denoting an SLS
configuration.
The Modify Default Visual menu item lets you set the default visuals and framebuffer depth on
a graphics device.
The second group of “Actions” menus can be thought of as screen actions. They will be activated
depending on which screens have been chosen.
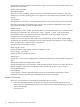
The Describe Screen and Identify Screen menu selections provide information about the device.
Identify Screen flashes the monitor that is connected to the graphics device.
The Modify Screen Options item contains options that are specific to each graphics device. This
list might be different for cards depending on the capabilities of each card.
Specific X server options can be set with the Modify Server Options menu item. See the item for
information on specific options.
Grayed out screen icons represent screens that have not been configured for use by the X Server.
You can select these grayed out icons and choose the Add Screen to Configuration menu item
to add screens to the X*screens.
using setmon to configure the monitor
setmon is a configuration tool used to change the monitor settings for a monitor attached to a
graphics device. This tool permits you to change the monitor's refresh rate and frame buffer
resolution. To change the monitor setting, the setmon command can be executed directly or done
through SAM/SMH.
The setmon executable is located at /opt/graphics/common/bin/setmon. Under SAM/SMH this
component is located under the top-level “Display” panel, under “Monitor Configuration”.
NOTE: Changing the monitor type while the X Server is running will necessitate killing and
restarting the X Server. In order to change the monitor settings, the X Server needs to be running
on the device specified.
X*screens file
For manual changes, please refer to the configuration files in the /etc/X11/ directory. Three files
of particular interest are the X0screens, X0devices, and X0pointerkeys files.
description of the X*screens configuration file
This file belongs in /etc/X11/X*screens, where “*” is the display number of the server. For example,
the “X0screens” file is used when the $DISPLAY environment variable is set to hostname:0.screen
and the server is invoked using the “:0” option.
32 configuring X server on HP-UX (HP Visualize-FXE)