
HP Systems Insight Manager 7.0 User Guide
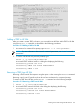
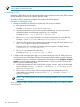
Table Of Contents
- Systems Insight Manager 7.0 User Guide
- Table of Contents
- Part I Introduction
- Part II Setting up HP SIM
- 3 Setting up managed systems
- 4 Credentials
- 5 WMI Mapper Proxy
- 6 Discovery
- 7 Manage Communications
- 8 Automatic event handling
- 9 Users and Authorizations
- 10 Managed environment
- Part III HP SIM basic features
- 11 Basic and advanced searches
- 12 Monitoring systems
- 13 Event management
- 14 Reporting in HP SIM
- 15 HP SIM tools
- Part IV HP SIM advanced features
- 16 Collections in HP SIM
- 17 HP SIM custom tools
- 18 Federated Search
- 19 CMS reconfigure tools
- 20 Understanding HP SIM security
- 21 Privilege elevation
- 22 Contract and warranty
- 23 License Manager
- 24 Storage integration using SMI-S
- 25 Managing MSCS clusters
- 26 HP SIM Audit log
- 27 HP Version Control and HP SIM
- 28 Compiling and customizing MIBs
- A Important Notes
- System and object names must be unique
- Setting the Primary DNS Suffix for the CMS
- Distributed Systems Administration Utilities menu options not available
- Virtual machine guest memory reservation size
- Insight Remote Support Advanced compatibility
- Database firewall settings
- Annotating the portal UI
- Security bulletins
- Validating RPM signatures
- Central Management Server
- Complex systems displaying inconsistency with the number of nPars within the complex
- Configure or Repair Agents
- Data collection reports
- B Troubleshooting
- Authentication
- Browser
- Central Management Server
- Complex
- Configure or Repair Agents
- Container View
- Credentials
- Data Collection
- Database
- Discovery
- iLO
- Linux servers
- Event
- Host name
- HP Insight Control power management
- Insight Control virtual machine management
- HP Smart Update Manager
- Systems Insight Manager
- Identification
- Installation
- License Manager
- Locale
- Managed Environment
- HP MIBs
- Onboard Administrator
- OpenSSH
- Performance
- Ports used by HP SIM.
- Privilege elevation
- Property pages
- Reporting
- Security
- Sign-in
- SNMP settings
- SSH communication
- System Page
- System status
- Target selection wizard
- Tasks
- Tools
- Upgrade
- UUID
- Virtual identifiers
- Virtual machines
- VMware
- WBEM
- WBEM indications
- WMI Mapper
- C Protocols used by HP SIM
- D Data Collection
- E Default system tasks
- Biweekly Data Collection
- System Identification
- Old Noisy Events
- Events Older Than 90 Days
- Status Polling for Non Servers
- Status Polling for Servers
- Status Polling for Systems No Longer Disabled
- Hardware Status Polling for Superdome 2 Onboard Administrator
- Data Collection
- Hardware Status Polling
- Version Status Polling
- Version Status Polling for Systems no Longer Disabled
- Check Event Configuration
- Status polling
- F Host file extensions
- G System Type Manager rules
- H Custom tool definition files
- I Out-of-the-box MIB support in HP SIM
- J Support and other resources
- Glossary
- Index

NOTE: When using the %i parameter, the current selection index (1, 2, 3, and so on) is substituted
for this parameter during the substitution process.
If the end of the repetition clause is reached and no %z parameter is encountered, the selection
index and current election are automatically incremented to avoid an infinite loop during the
substitution phase.
In the above example, if there were two selected target systems, the expanded URL string would
look like this:
https://deploy.hp.com:280/deploy/deployimage.jsp?
device1=nodea.hp.com&device2=nodeb.hp.com
If there was only one selected target system, the expanded URL string would look like:
https://deploy.hp.com:280/deploy/deployimage.jsp? device1=nodea.hp.com
Because there is no current selection when the string gets to the repeat block, the repeat block is
suppressed during the substitution process.
Creating custom tools through the GUI
Use the Manage Custom Tools page to view and manage custom tools created through the New
Custom Tool feature. The Manage Custom Tools page displays a table listing the custom tools
and information on each tool. The table includes:
• Selection column
• Name
• Description
• Command
• Run as user
• Automatic Event Handling
The following options are available for managing custom tools:
• “New”
• “Edit”
• “View tool definition”
• “Run Now/Schedule”
• “Delete”
New
Use to create a custom tool and open the Select the tool to create page.
Edit
Use to edit an existing custom tool. Select the tool, and then click Edit. The Edit Custom Tool
Details section appears. You can edit all fields and add or delete environment variables.
View tool definition
Use to display the XML code for the tool. This tool is not enabled if you select more than one tool.
Run Now/Schedule
Use to run the tool immediately or to schedule the tool to run (if the tool can be scheduled). If the
tool can be run, the schedule a task page appears. You can schedule when and how often the
tool runs.
Creating custom tools through the GUI 101