
System Management Homepage 7.3 Installation and Configuration Guide


NOTE: If SPP or ISP contains an older version of HP SMH than what is installed on the target
server, the HP SMH component is listed under the Installation not needed section. In this case,
click Installation Options for HP SMH component and select the Force Install checkbox. The
HP SMH component is listed under Updates to be installed.
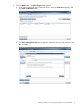
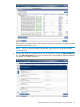
9. After selecting the component, click Install. A screen appears showing the installation progress.
10. After installation is finished, the Installation Result panel appears. In the Installation Result
panel, the Reboot Now and Exit buttons appear.
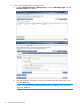
11. To reboot the system, select Reboot Now. To exit the program, select Exit. The HP Smart Update
Manager program is complete.
Preconfiguring the HP SMH component
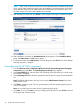
1. From the Welcome to the Configuration Wizard for the HP System Management Homepage
Component page, click Next. The Operating Systems Groups page appears.
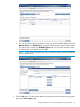
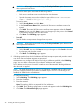
2. In the Group Name field, enter the name of an operating system group that you want to assign
(for example, vcadmin).
3. In the Operating Level field, select the appropriate level for the new group from the dropdown
list.
Note: The default Administrator and any account under Administrators Group always have
administrative access.
4. Click Add to assign the group. The new group appears under the operating system group to
which it is assigned.
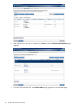
Note: You can add up to five entries for each operating system group.
5. Click Next. You can click Save to save your changes up to this point or click Cancel to discard
the changes and close the wizard.
46 Installing HP SMH using HPSUM