
HP Systems Insight Manager 7.2 Technical Reference Guide
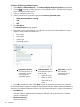
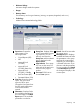

Table 40 Enhanced Reports options (continued)
AccessDescriptionName
Select Reports→Enhanced Reports....
The Enhanced Reports, Reports by
Enables a report to be run at a later
specified time.
Email Reports
Product page appears. Select the report
that you want to schedule, and then
click Email Report....
See Emailing reports.
Select Reports→Enhanced Reports. The
Enhanced Reports, Reports by Product
page appears.
Enables a user defined report to be
deleted.
Deleting Reports
See Deleting a report.
Related information
New reports
Procedure 190 Creating a new report
1. From the HP SIM menu, select Reports and then, click New Report.... The New ReportStep 1:
Select Target Systems page appears.
2. Select the desired Target Systems. For more information, see Creating a task
The Step 1: Verify Target Systems page appears.
3. If you want additional targets, click Add Targets....
If a device is not needed, select the targeted device, and then click Remove Target.
Click Next to verify the selected targets.
The Step 2: Specify Parameters page appears.
4. In the Report Name: field, enter a name for the report.
NOTE: Report names cannot contain any of the following characters: < > ' & \ ` , # + | %
; / \\ ! ~ @ $ ^ * = { } [ ] " : and ?
5. In the Select items to show in report: section, select all categories or items to include in the
report. You can click the icon to expand a category, and then select specific items or click
the icon to collapse a category.
6. Under Layout for generated or saved report:, chose either of the following options.
• Show all systems in the same table.
This option displays all categories and items selected in the Select items to show in report
section. The selected categories appear as tables, and the selected data items appear
as column headers in the report. All systems appear in the same table.
• Show each system in a separate table.
This option displays all categories and items selected in the Select items to show in report
section. The selected categories appear as tables, and all the selected data items appear
as column headers. Each system appears in an individual table.
7. Under Format for generated report, select from the following options:
• HTML (Recommended for viewing)
• XML
• CSV
8. To save the report configuration, click Save Report.
314 Operations