
HP SVA V1.1 Patch Kit 3 Readme/Release Notes


2.2 Installation Procedure
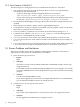
How you follow these installation steps depends on when you install the patch kit:
• You are installing the patch kit as part of a full XC/SVA installation from scratch.
1. In this case, begin the installation procedure as documented in the V1.1 HP SVA
Installation Guide. Complete through Step 10 in the Initial Installation on the Head Node
section.
2. Return to this document (the Patch Kit 3 Readme document) and now begin with the
steps in this section, namely, the Installation Procedure section.
• You are installing the patch kit over an existing SVA installation.
In this case, follow the numbered steps in this section in order to complete the patch kit
installation.
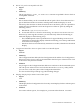
1. Copy the patch kit from its web location to the /root directory on the head node of the HP
SVA cluster. See Section 2.1.1 for details on the web location for patch kits and Section 2.1.4
for patch kit naming conventions.
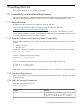
2. Open the tar file from the appropriate directory using the following commands:
# cd /root
# tar zxvf SVA-1.1.3.tar.gz
This creates an sva_upgrade directory under /root. You can delete the sva_upgrade
directory when the upgrade is finished.
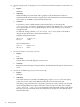
3. If necessary, save files on non-head nodes somewhere where they will not be overwritten
by the XC imaging process.
IMPORTANT: You may have files that were copied to non-head node system disks without
using the standard XC golden imaging process. If you want to keep those files, save them
somewhere where they will not be overwritten.
Tip:
Make sure no one is using the cluster before you proceed with the remaining steps.
4. Installing the graphics driver shuts down the X Server. This makes it difficult to install from
the console. To continue the installation conveniently, switch to one of the Linux virtual
consoles on the head node using the key sequence Ctrl+Alt+F# (where # is 2...6). Switching
to one of these virtual consoles lets you log in to the system using a normal terminal-like
interface that is unaffected by the X Server state.
5. Begin the upgrade process from the appropriate directory using the following commands:
# cd /root/sva_upgrade
# ./upgrade
The Patch Kit upgrade begins. Your SVA and XC configuration remains the same after the
upgrade. If you previously changed any configuration files that are upgraded by the patch
kit, these files are kept in /opt/sva/site_changed_files/1.1.3. For example, if you
changed /opt/sva/bin/sva_init.sh (which is also changed by the upgrade), it would
be saved in /opt/sva/site_changed_files/1.1.3/opt/sva/bin/sva_init.sh.
6. At this point, there are two possibilities for switching back to the head node's X server:
20 Installing Patch Kit