
HP Scalable Visualization Array, V1.1 Software Installation Guide


clock=null
type=xw9300
Configuring and Imaging the HP XC System
Follow all the steps in the
HP XC Installation Guide: Configuring and Imaging the System
up to but not
including the
Run the start_sys Utility to Start the System and Propagate the Golden Image
section. During
those steps, be aware of the following:
• The discovery process asks you for the number of nodes in the cluster and the number of workstation
nodes in the cluster. For clusters with only workstations, these two numbers are the same.
• The switch discovery process takes about ten minutes. When prompted, switch on the nodes without
console ports; that is, all the render and display workstations. When prompted, switch off the same
nodes, leaving the head node on.
• As part of this stage of installation, HP recommends that you configure the external Ethernet devices
on the SVA nodes; that is, the external NICs. This is important if you plan to install the optional HP
Remote Graphics Software kit (RGS). You will need the IP addresses and the fully-qualified name
domains. Refer to the
HP XC Installation Guide
for details on configuring external Ethernet devices.
• As you work through the
HP XC Installation Guide
:
Question and Answer
section, indicate whether you
are using a KVM, the names of the display nodes in the SVA, and the names of the HP RGS nodes (if
any). This information is needed for the cluster configuration.
• This step only applies to the installation of the SVA Software Kit on an existing HP XC cluster. This step
is needed only if the number of SVA nodes exceeds the maximum number as specified during the
cluster_prep step. Run the following command immediately before the HP XC cluster_prep
step:
# /opt/hptc/sbin/reset_db
Additional SVA Configuration
After you have completed the
Configuring and Imaging
stage as described in “Configuring and Imaging
the HP XC System” (pg. 13), follow these SVA-specific steps:
1. Modify the default SLURM partition configuration. This is different than the step in the
HP XC Installation
Guide: Modify SLURM Characteristics
. Make one of two changes to the
/hptc_cluster/slurm/etc/slurm.conf file, depending on whether you intend to use LSF on
the cluster.
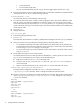
• If you are using SLURM only and not LSF, change /hptc_cluster/slurm/etc/slurm.conf
as follows:
PartitionName=lsf RootOnly=YES Shared=FORCE Nodes=<nodelist>
To:
PartitionName=lsf Default=yes RootOnly=NO Shared=NO Nodes=<nodelist>
Note: Do not include the head node (head node is the highest numbered node) as one of the
nodes in the <nodelist>.
You also need to add an entry to the prolog/epilog section of the slurm.conf file:
Epilog=/opt/sva/sbin/sva_epilog.clean
• To use LSF, create two partitions, one for visualization jobs and one for LSF jobs. Each of the
nodes in the cluster must only be present in one partition. For example, assume a cluster has five
nodes in which node 5 is the head node; nodes 1 and 2 are visualization nodes; and nodes 3
and 4 are compute nodes. Change /hptc_cluster/slurm/etc/slurm.conf as follows:
PartitionName=lsf RootOnly=YES Shared=FORCE Nodes=n[1-5]
To:
PartitionName=lsf RootOnly=YES Shared=FORCE Nodes=n4
PartitionName=vis Default=yes RootOnly=NO Shared=NO Nodes=n[1-3]
Full Software Installation from Scratch 13